
What We Shipped: New Automation Builder, Email Campaigns, Popups and Forms, Brand Styles and More
We are excited to announce that Growmatik has undergone some exciting new updates that our users have been asking for! Our recent improvements have touched upon various aspects, including the main interface, automation building UX, email campaigns, popups and forms, and more.
Let’s dive into the highlights of our improvements since April 2023.
A fresh new sidebar for better navigation
The first thing you may have noticed upon entering the Growmatik app recently is its restructured sidebar. Your sidebar now displays a clear list of items with their titles (previously, it only showed icons) as well as its subsections right below the nested sections (formerly you had to open the main section to see the inner items, like the People section.)
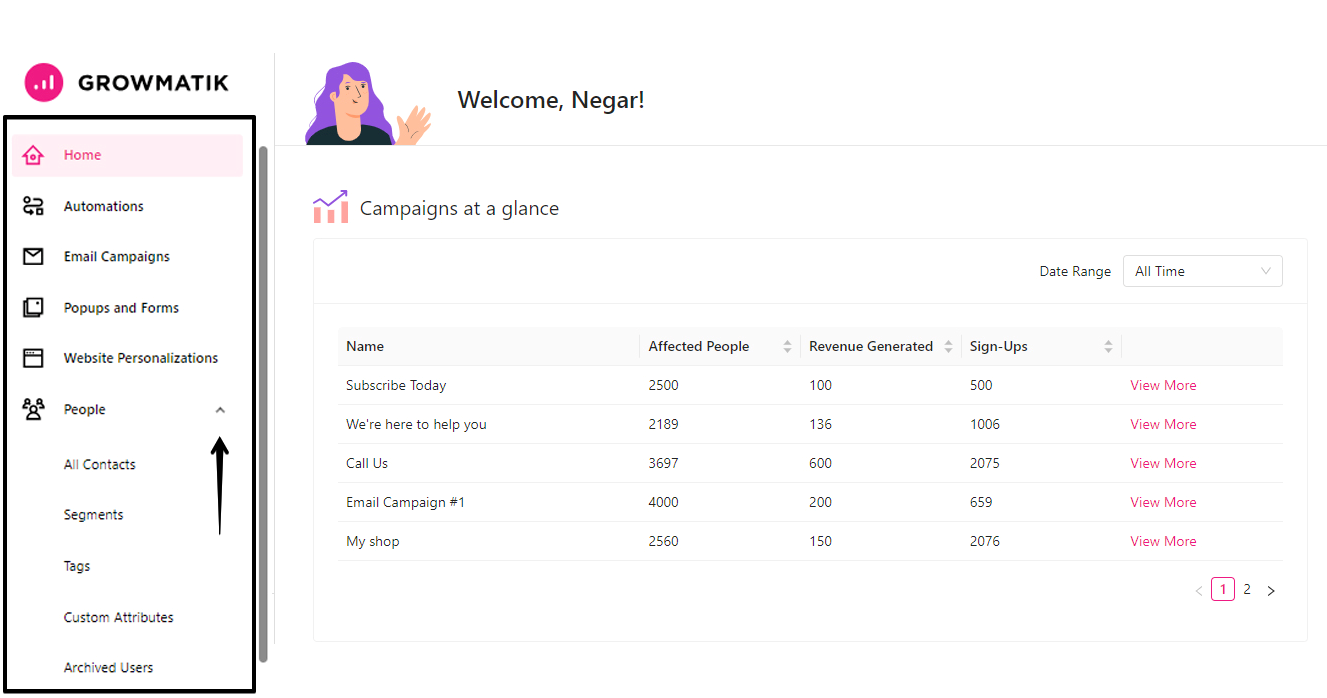
You will also notice some additional changes to the structure, such as the new email campaigns, popups and forms, and website personalizations having their own section in the sidebar. We will cover these changes later in this article.
Next-generation automation section
Smart automations are the backbone of Growmatik, and we are constantly looking for ways to make them more efficient, intelligent, and personalized. We have now introduced a completely new user experience for building automations, making it easier to create, manage and maintain.
An easier user experience for creating automations
Previously, the automations creation process occurred within a single screen. However, the new automation creation process now follows a step-by-step approach which makes the creation process much more intuitive, organized and easier.
To create a new automation, simply follow these steps:
- Navigate to the automation page located in the left sidebar.
- Select the “Start from Scratch” button located in the top right corner of the page
- Choose whether you want to create a Rule or Workflow automation.
- If you choose to create an automation Rule, you will now be directed through four steps such as trigger, audience, action and review where you define details for key components of the automation rule or workflow.
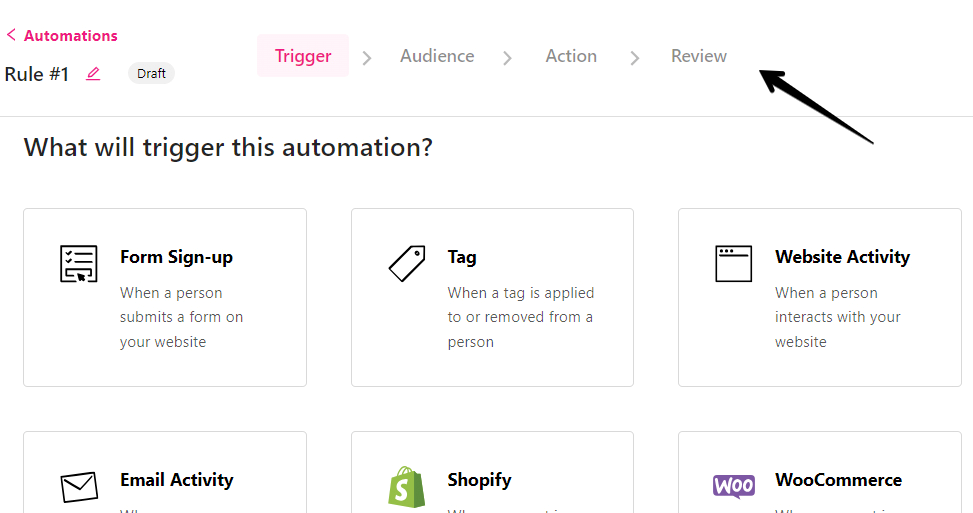
The options are available to define changes based on different triggers and actions. Additionally, there is a review step which provides a general view of automations and their key details, presented in a view like this:
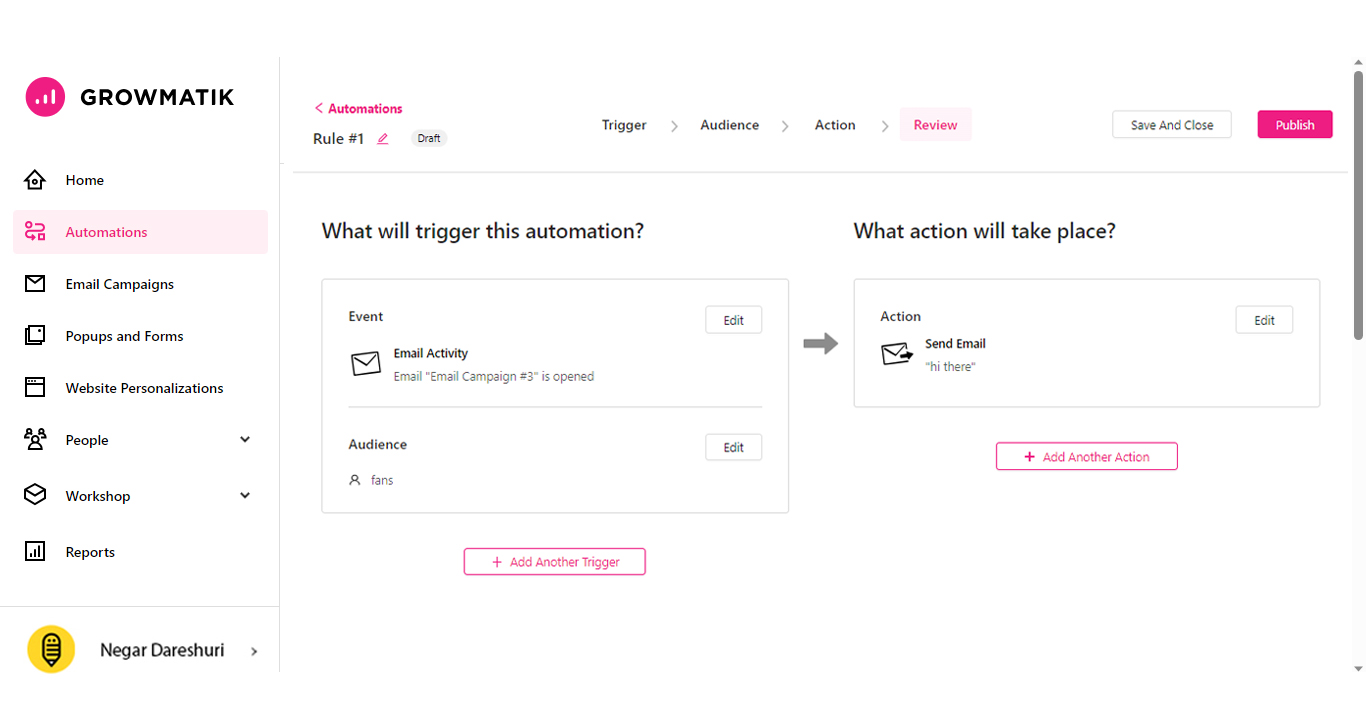
If you choose to create a workflow, the new UX applies to the trigger and audience step but for the remaining steps, you can continue building from the workflow builder environment as before.
You can check out this knowledge base article to learn more about the new automation building in Growmatik.
More organized and informative automation page
The automation main page now provides a summary of the automations directly in the main page. Key details such as event, audience and action are now displayed right next to the name of the automation.
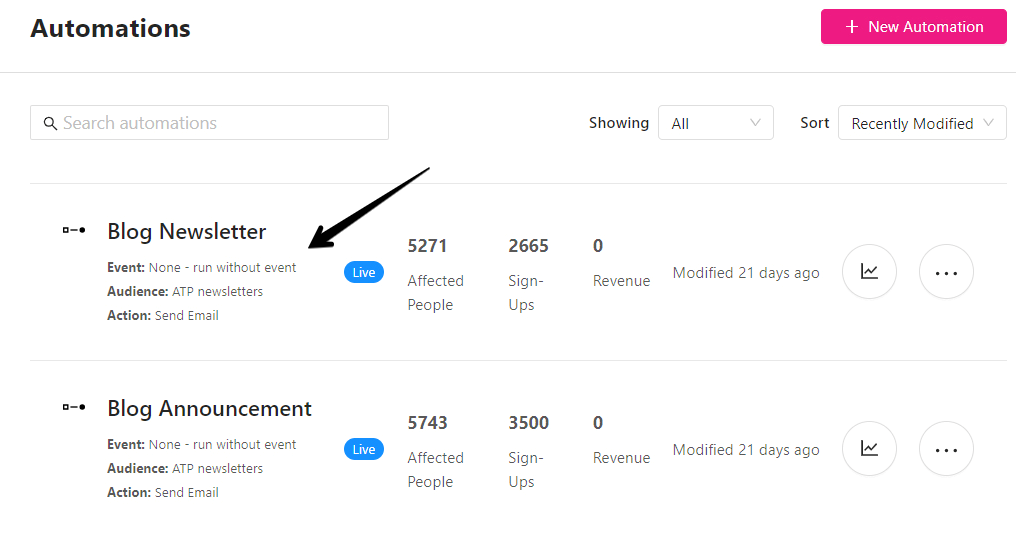
In order to measure the performance of an automation, you previously had to open the automation and click on the analytics tab of the automation. Now, you can simply click on the analytics icon for each automation right on the main automation page to access the analytics section of that automation.
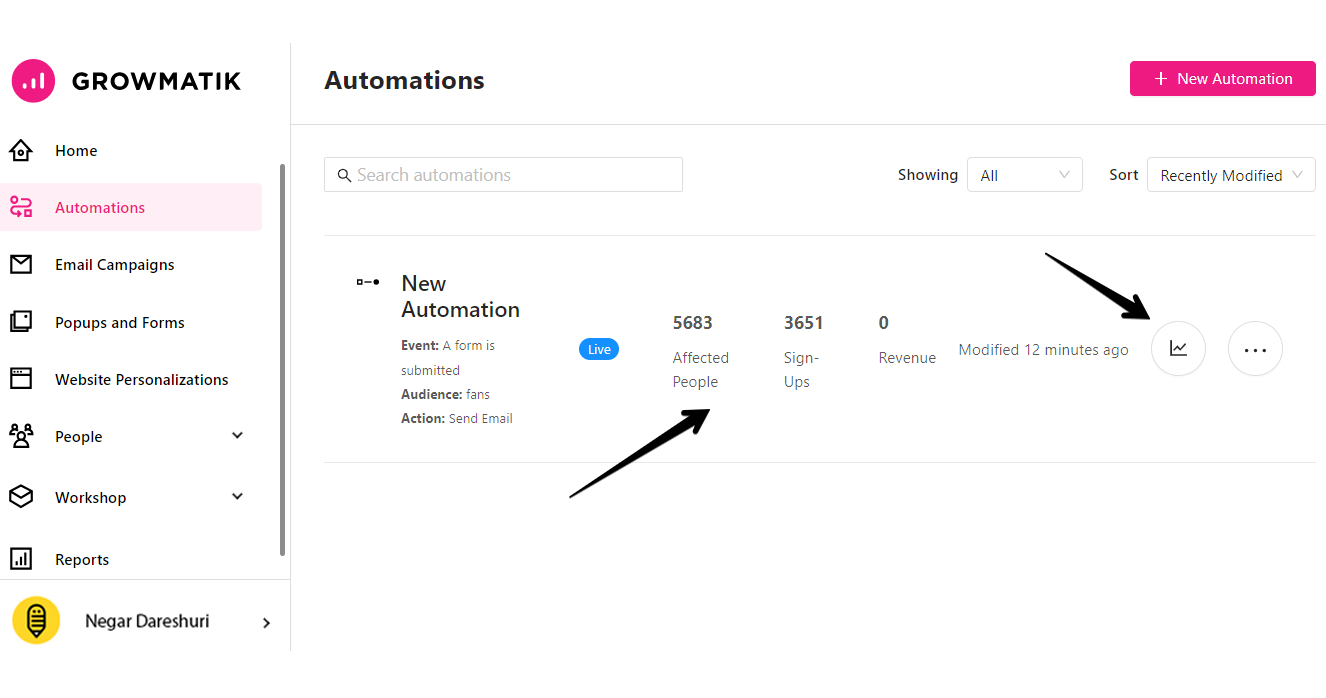
You can also find the key performance indicators such as affected people, sign ups and revenue directly on the main automation page, without the need to open the automation profile for each automation.
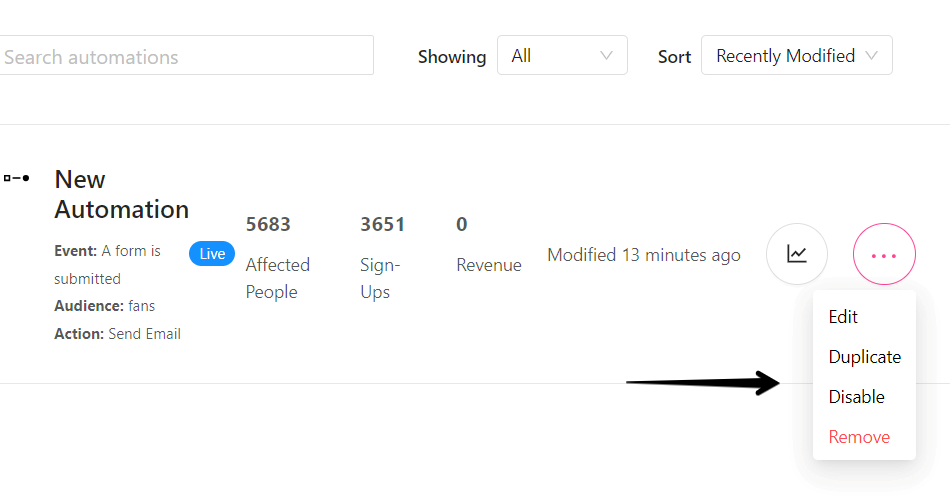
And finally some key actions related to automations such as publishing, disabling and enabling, can be done right from the automation page, without the need to create the automation profile.
Introducing Email Campaigns
Automated emails typically refer to transactional emails triggered by certain conditions or behaviors. On the other hand, broadcast emails are usually one-off campaigns sent for certain occasions or promotional purposes.
Previously, email campaigns and automations were created using the same user experience on the automations page. However, the nature of these two email types differs, requiring specific options and user experiences, which constitutes adding certain options and user experience for each of them.
We have now separated the user experience and creation process for these two email types, providing efficient user experiences for creating, managing, and maintaining them. For example, the scheduling factor is clearly definable for one-off campaigns, but not for automations, as automations are continuously in progress.
You can continue creating the automated emails from the automations page but for one-off email campaigns, you have now a whole-new separated section called “Email Campaigns” in the side bar where you can simply create and manage your one-off email campaigns.
Highlights of the new email campaigns builder
Enjoy the new step-by-step builder, to build your email campaigns in a much more organized way and through a very simple and intuitive UX. Within a series of five simple steps, you can define the content, recipient, settings and scheduling for your campaign.
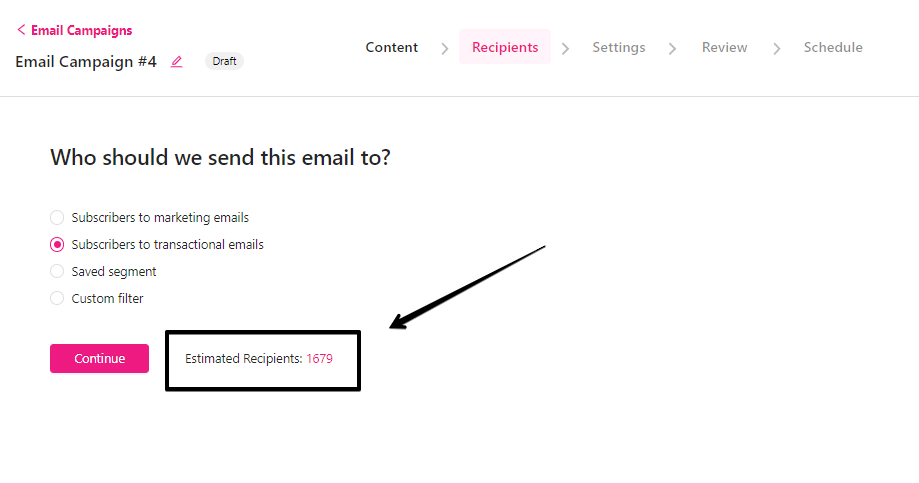
See estimated number of recipients for your campaign
In the Recipients step of the campaign builder, you can also view the estimated number of recipients based on your defined audience criteria.
View and manage all your email campaign in one page
On the main page of the email campaign section, you will find a list of your email campaigns with relevant information and analytics where you can Stop, duplicate or remove your campaigns.
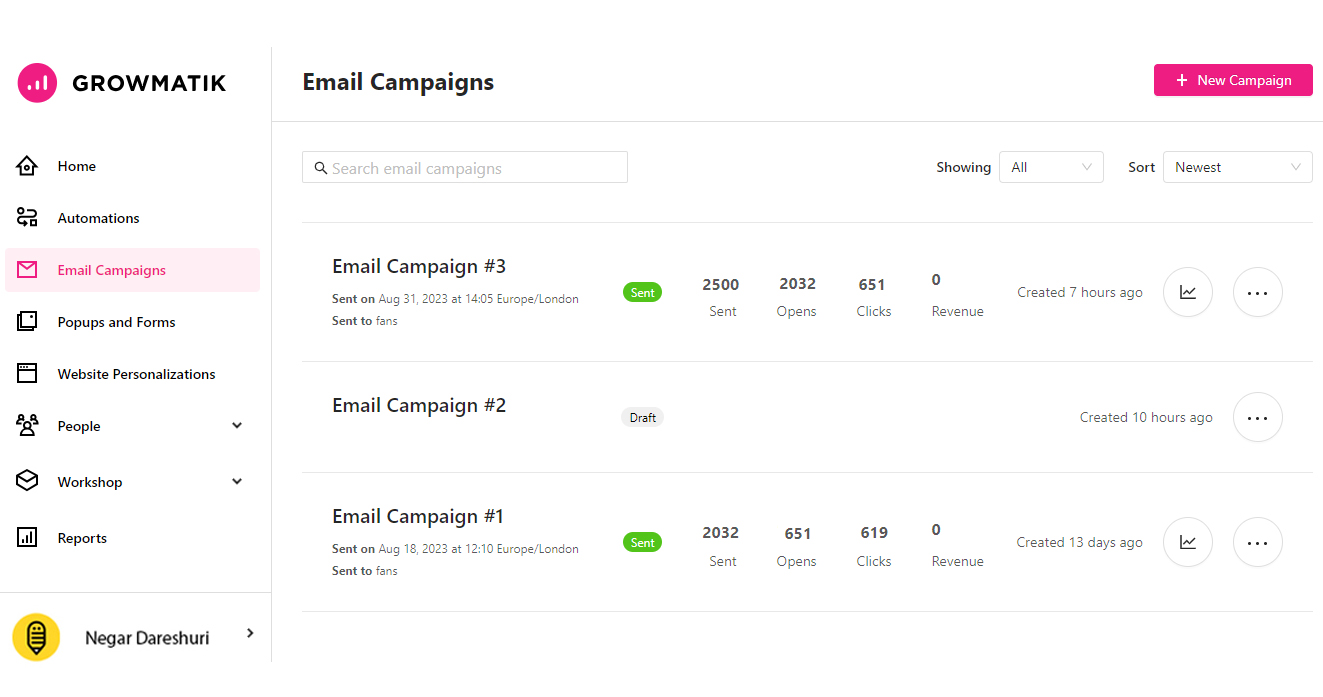
Check this knowledge base article to learn more about the email campaigns main page.
How to create an Email Campaign in the new campaign builder?
To create an email campaign in Growmatik, follow these steps:
- Click on the “Email Campaigns” page in the left sidebar of your dashboard.
- Click on the “+ New Campaign” button.
- Choose a pre-designed template, preview it and click on “Use this template”. Alternatively, click on the “Start from scratch” button to create your own template using the HTML editor or drag-and-drop builder.
- Select your audience. You can choose to send to premade segments or create a custom audience right from here.
- Set your campaign settings, such as subject line, sender address, and outbound email address.
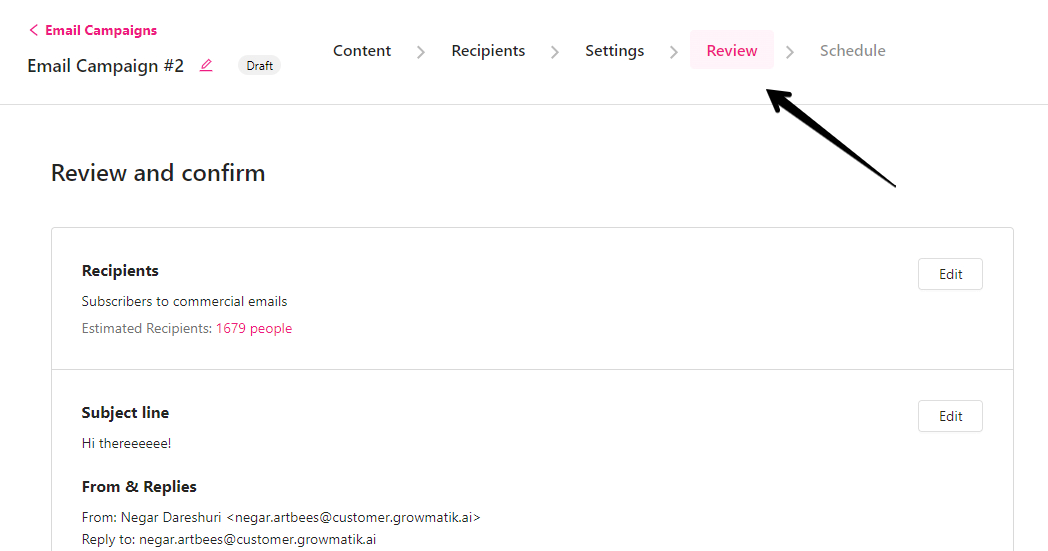
- In the review step, you can see an overview of your campaign based on the criteria you defined in the previous steps. You can also preview your email and settings and send a test email.
- And finally, schedule your campaign for immediate or future delivery.
And boom, you can view your campaign on the Email Campaigns page!
The new Popups and Form section
Previously, you could create popups through automations or from the automations page. Now, popups have their own section in the sidebar. Same as the new email campaigns section, in the new popup and forms section you can manage and create all your popups and forms in one central place. Also using the options menu, you can edit, publish, disable, duplicate, view sign-ups, or remove a popup.
Let’s have a quick look on how to create a new popup and embedded form.
The new popup builder workspace
The new workspace for the popup builder includes almost all you need to create your popup campaign in a highly organized and intuitive way.
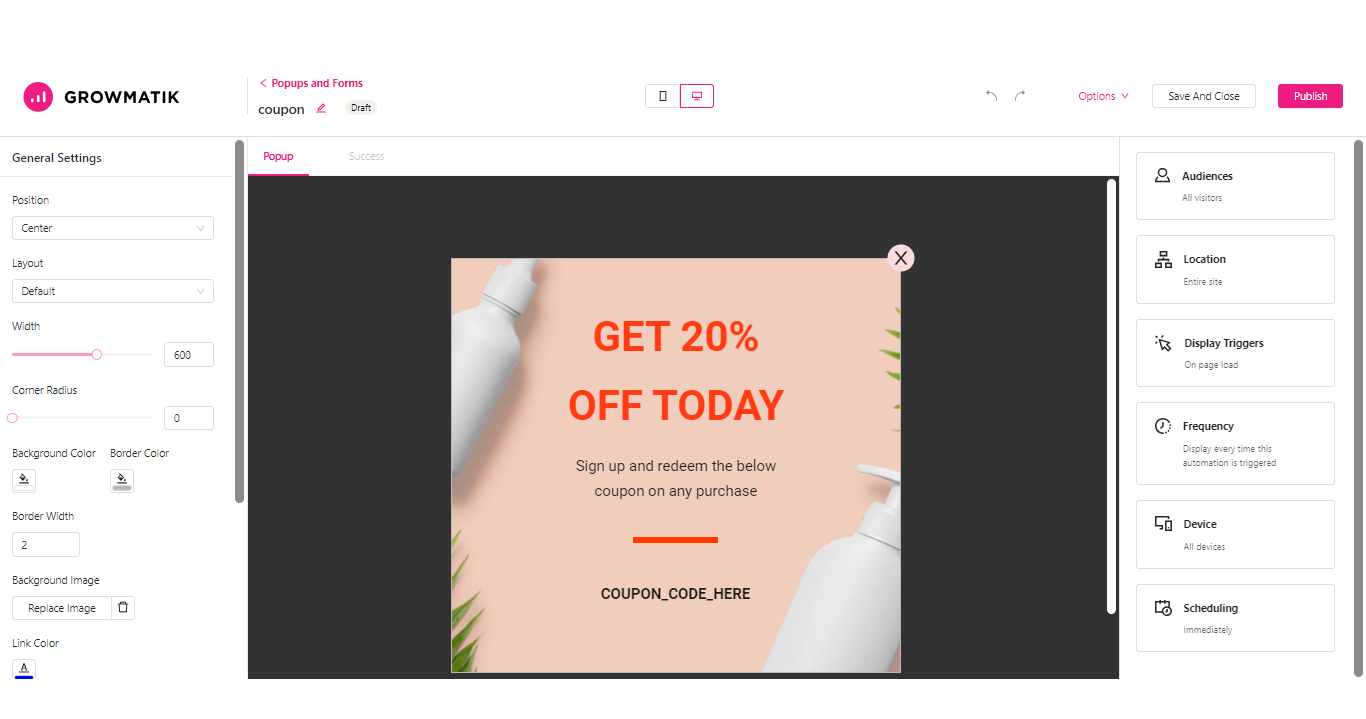
In the new popup builder in Growmatik, you can not only build and customize your popup template as before but also define the popup settings such as audiences, location, display triggers, frequency, scheduling and more in the right sidebar.
Simply click on the setting in the sidebar and define the parameters in the upcoming dialogue without needing to leave the builder page.
Creating a New Popup and Embedded Form
To access Popups and Forms, navigate to the left sidebar and click on the “Popups and Forms” section.
- Select the “New Popup / Form button”. Once you arrive at the new page, you can choose one of three starting points: Pre-designed template, My Templates, or Start From Scratch.
- By selecting “Start From Scratch”, you have the option to create either an Embedded Form or Popup.
- By hovering over a template from the Pre-Designed or My Template tab, click on the “Preview” button to see the popup in more detail.
- When you are ready, click on the “Use This Template” button, and you will be taken to the new popup builder space.
- Build and customize the popup content and define all the other details from the sidebar.
- Once done, click on the “Publish” button, and your popup will be immediately published. Alternatively, you can save the progress and close the builder to continue from where you left off later on.
The new website personalization section
Similar to email campaigns, popups and forms, the website personalization also has its own separate section inside Growmatik where all the webpage personalization instances are created and managed.
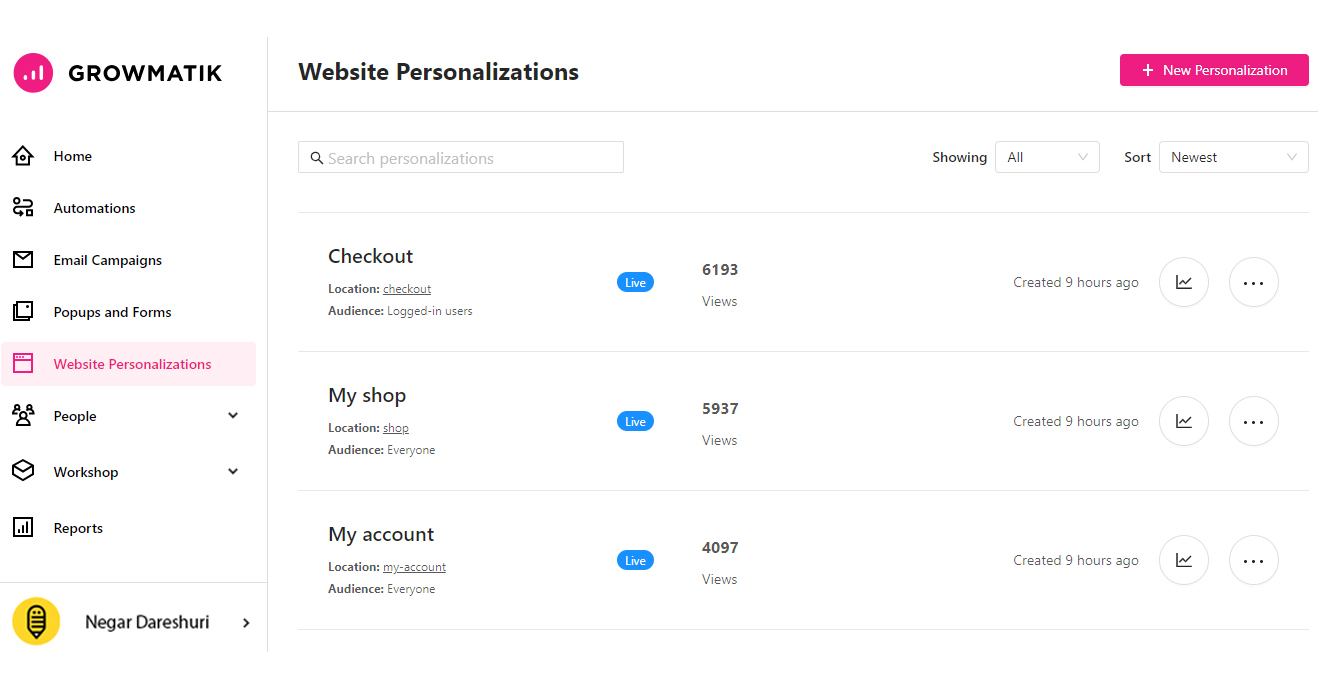
By clicking on the “+ New Personalization” button on this page, you will go through a simple three-step process to define the location (the page you want to personalize), audience and content.
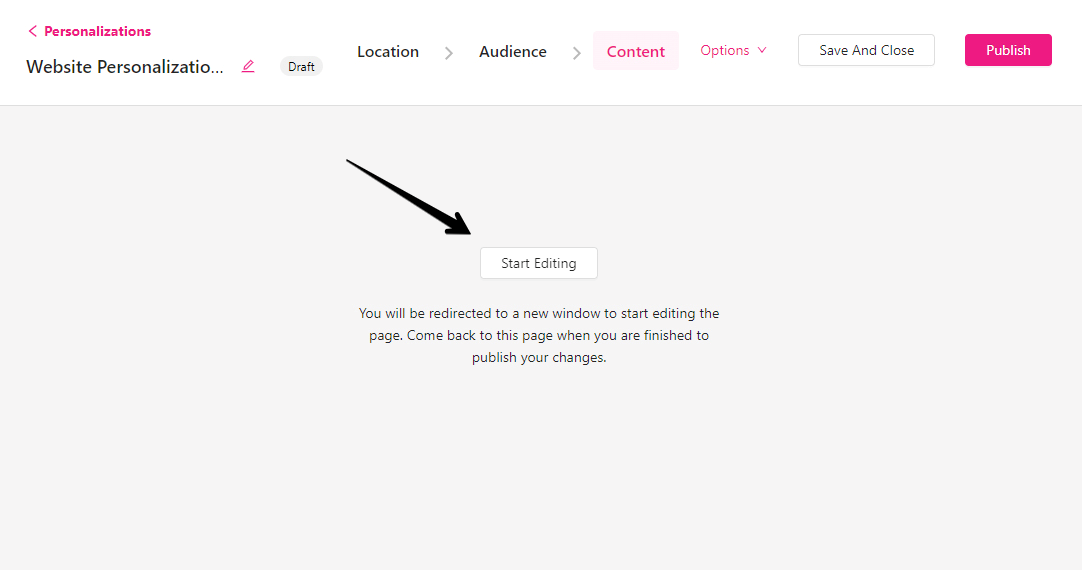
In the Content step, click on the “Start Editing” button, and a new window will open where you can apply the needed personalization to the page. You can preview how the personalizations will appear to the audience, save and close the personalization window. You will then be back to the creation wizard where you can simply publish, and the personalizations will go live.
Growmatik’s content generation AI
Earlier in May, we announced the launch of Growmatik AI, marking a significant milestone in smart marketing automation and furthering our mission of enabling fast, efficient, and informed digital marketing.
By utilizing Growmatik’s generative AI, you can create marketing copy for marketing campaigns, emails, and popups and more based on your specific criteria and preferences. The AI-powered content generation feature will be available within the “text” element across different parts of Growmatik, including the email builder, the popup builder, and the form builder.
To learn more about the Growmatik AI assistant, you can read this post.
How to use Growmatik’s AI text generator
To use Growmatik’s AI-powered text generation feature, you need to
- Click on the “+” button located anywhere within the canvas and choose the “text” option.
- Click on the new AI icon (depicted as magic sparks) located next to the text element block. This will open a panel on the right-hand side of the screen, where you can enter the topic or subject you would like the Growmatik AI to write about.
Then, click on the “generate” button to initiate the AI text generation process.
With this feature, there are many different subjects and topics you can request the AI to write about, giving you a wide range of options for creating high-quality marketing content quickly and easily.
The New Brand Style in Workshop
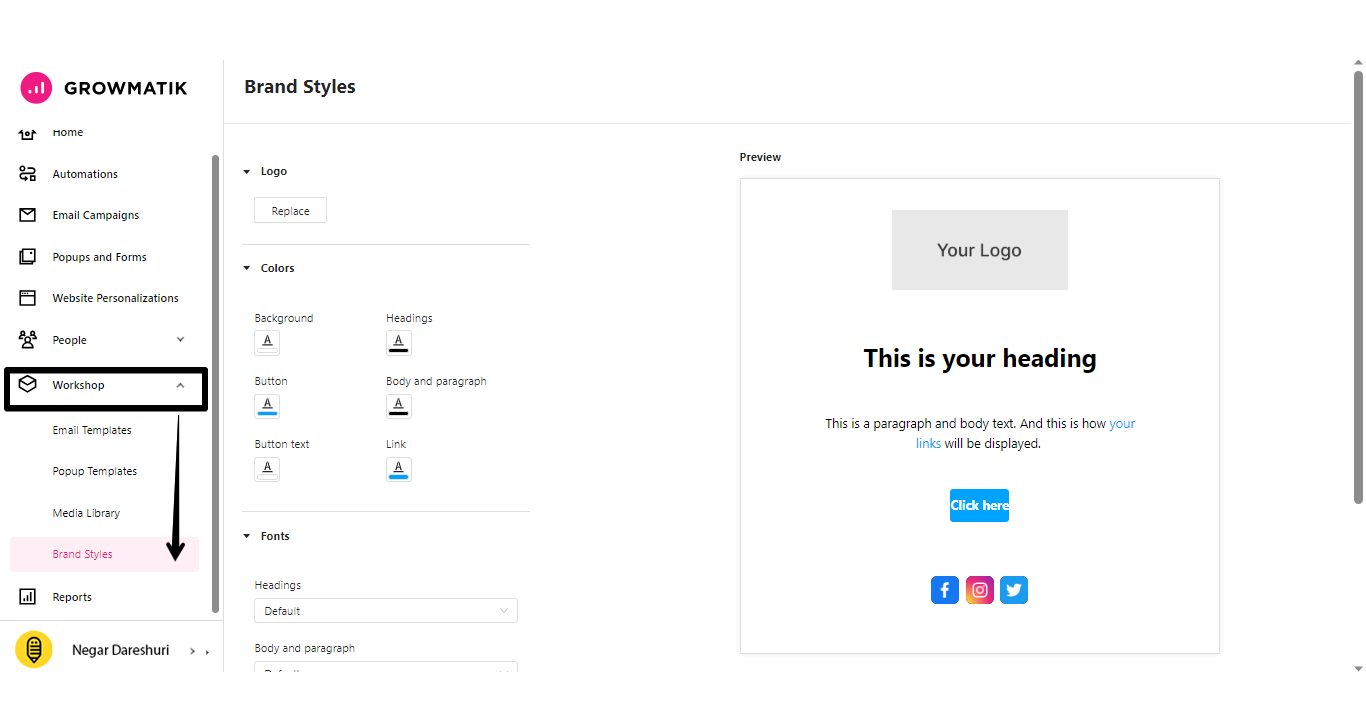
Brand Styles are the main characteristics of your brand, such as the logo, colors, fonts, and more, that are reflected in packaging, website, ads, campaigns and more. This is quite critical for a better establishment and faster awareness period for a brand.
With the new brand styles feature in Growmatik, you can ensure that your brand characteristics are consistently reflected in your marketing material, including emails, popups and more.
These styles are automatically applied to individual elements such as logos, fonts and colors when using the drag and drop builders in Growmatik, saving you time to apply them every time building marketing visuals for your campaigns.
You can find this feature in the main left sidebar, under the workshop section. By editing this section, the changes are immediately applied to all templates and elements using those styles throughout the workshop.
But we’re not stopping there!
As usual, a lot of exciting things are in the cook in our AI lab. Amazing new AI features are coming to Growmatik soon that will make you and every other marketer and business owner’s life a lot easier and delicate.
We are also working on in-depth improvements to our Reports section, where you will see much more detailed analytics about your campaigns and their performance.
As usual, do let us know what you think about the new features and improvements covered in this article, and stay tuned for more updates on the upcoming features.

