
We’re back with a new round of updates based on the most requested features. We recently added new features such as improvements to popup builder including countdown timer. We also introduced webhooks as a new automation action type, Checkout Started as a new event and many more. The following are the highlights of our additions and improvements since December 2022.
Popup Success Step
Steps are different views in a popup that are triggered by the submit button. In our recent update we’ve added one step called “success” to the popups where you can customize the content to display when a form is submitted successfully.
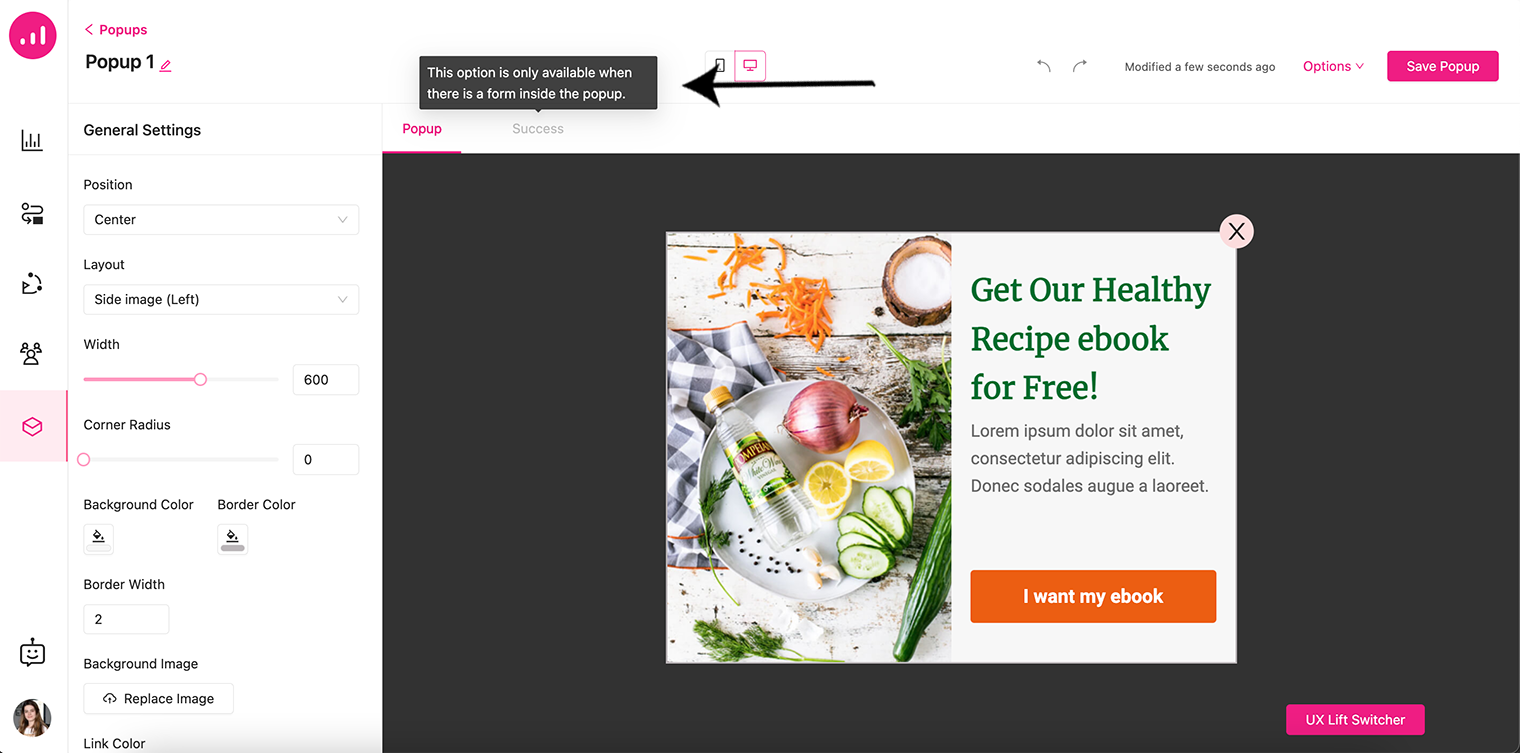
When you either create a popup from scratch or choose one of the pre-made popup templates with forms, you will see a tab bar beside the General Settings tab, which currently consists of two states, “Popup” and “Success”. Switching between these two tabs, you can customize your popup’s main content and also the content when a form inside your popup is submitted successfully.
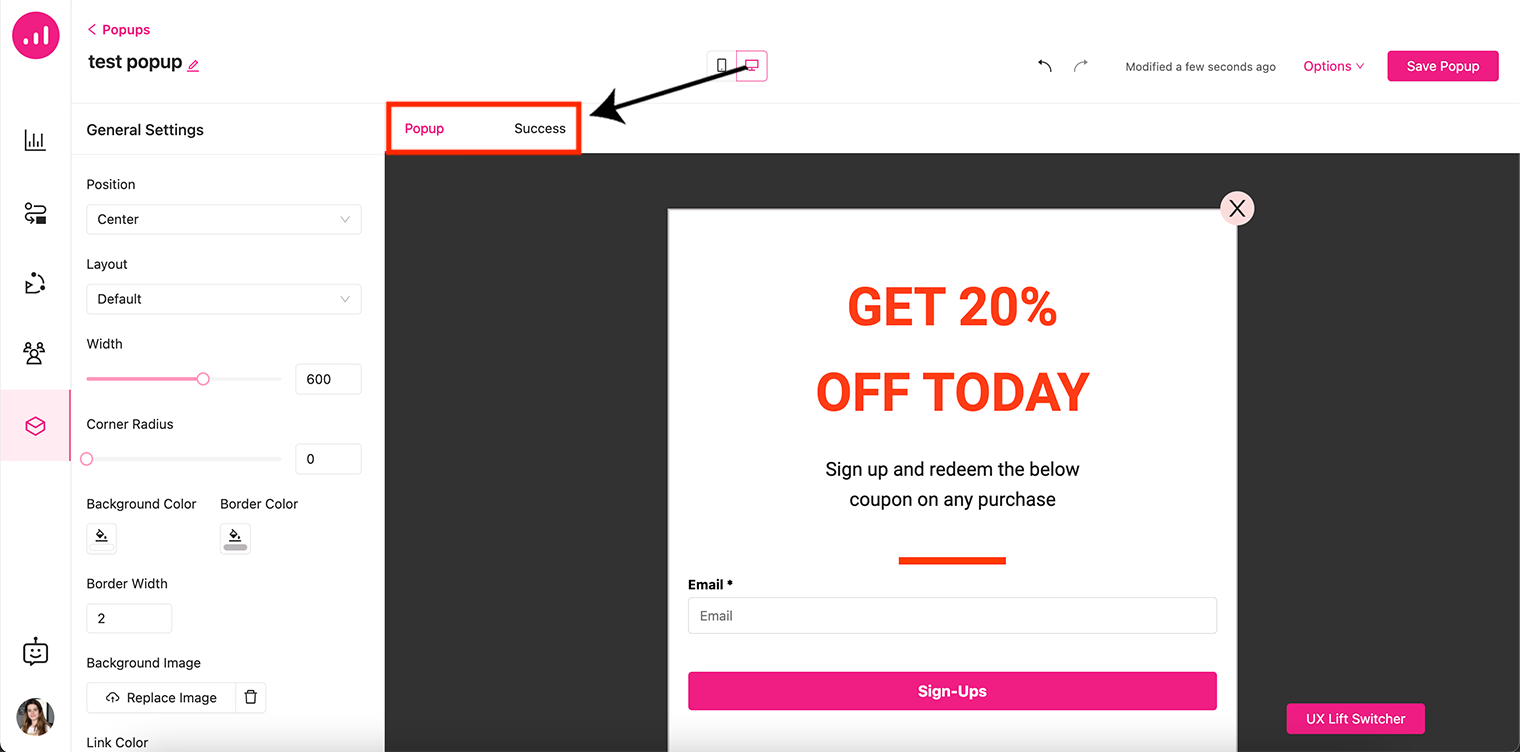
As we said above, the Success tab appears when a form is inside the popup. This means if a form element is not used inside the popup the success state will be disabled.
A success step message can display confirmation messages for your popups such as: ‘Thank you for signing up’ and ‘Please check your inbox for your exclusive coupon!’.
Popup Countdown Timer
In our newest series of updates, we have added a Countdown Timer exclusively to the popup builder to use as a way to attract more buyers and increase conversion.
When we know something is about to go away, we tend to grab it as soon as possible to avoid missing out as it becomes more attractive. Marketers use this as a way to create a sense of scarcity and urgency in promotional campaigns.
The best way to do FOMO (fear of missing out) urge to a popup is to add a countdown to show how much time remains before the promotion goes away.
When adding a new element in the popup, there is now a new element called “Countdown Timer”. When you click on it, a countdown appears in the popup which you can set based on “Due Date” or “Duration”.
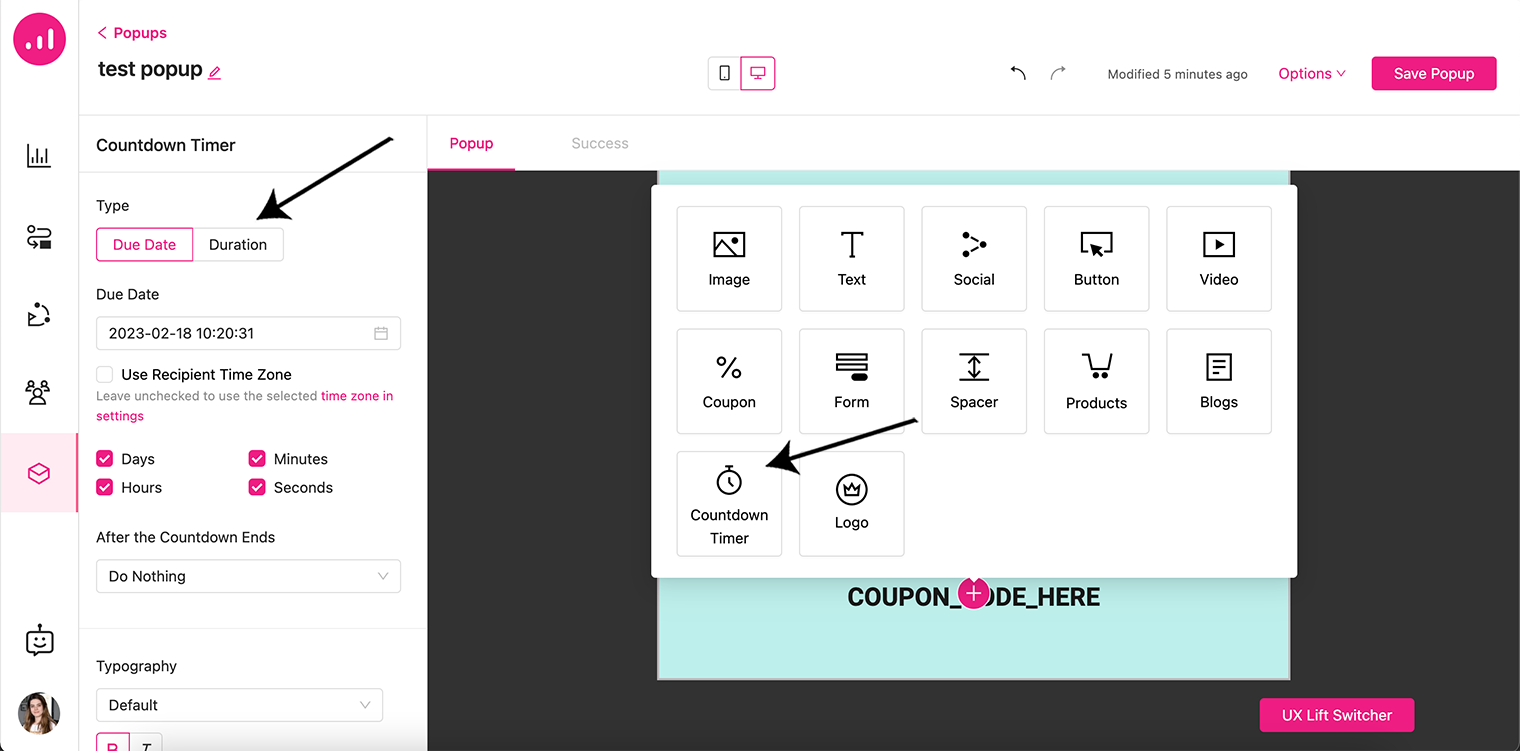
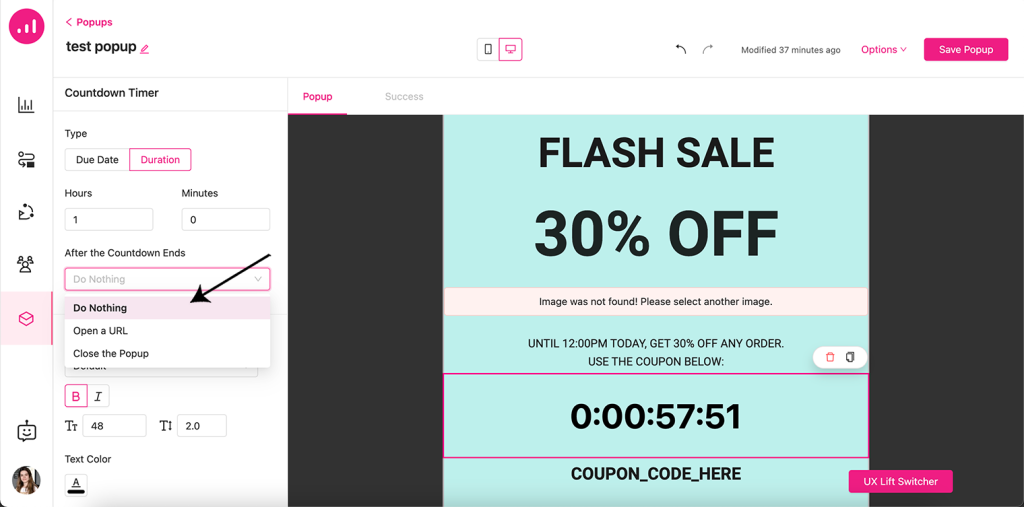
Due Date is used when you want the countdown to appear at a specific date, with an option to set it according to each recipient’s timezone. And Duration is to set the popup to be shown at a specific time period like 2 hours or 2 days, etc.
There is also an option to decide what to do when the timer ends. You can choose to Do Nothing, Open a URL or Close the Popup. The two other options being clear on purpose, the Open a URL option redirects you to a new page when the timer ends.
HTML Editor for Custom Email Templates
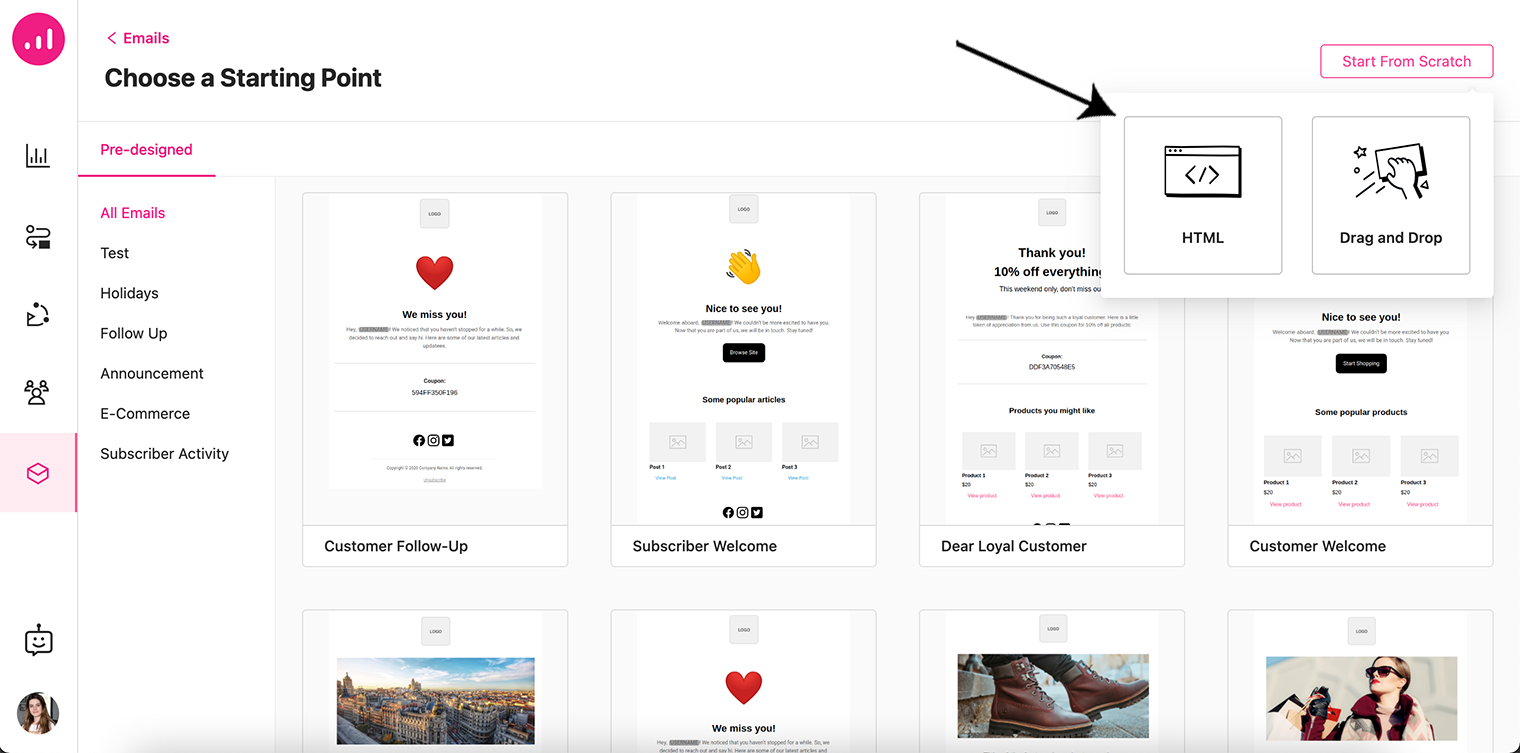
We have added an HTML editor for emails so you can create your own custom-coded email templates as you wish. When you click on the Start from Scratch button in the email builder area, two options pop up:
- HTML : which opens the HTML editor
- Drag and Drop: which opens our current email builder with all the pre-made templates
By clicking on the HTML option, you can now start editing your custom-coded email to your liking. There is also an option to preview what you have created by clicking on the preview button on the tab bar above the HTML editor.
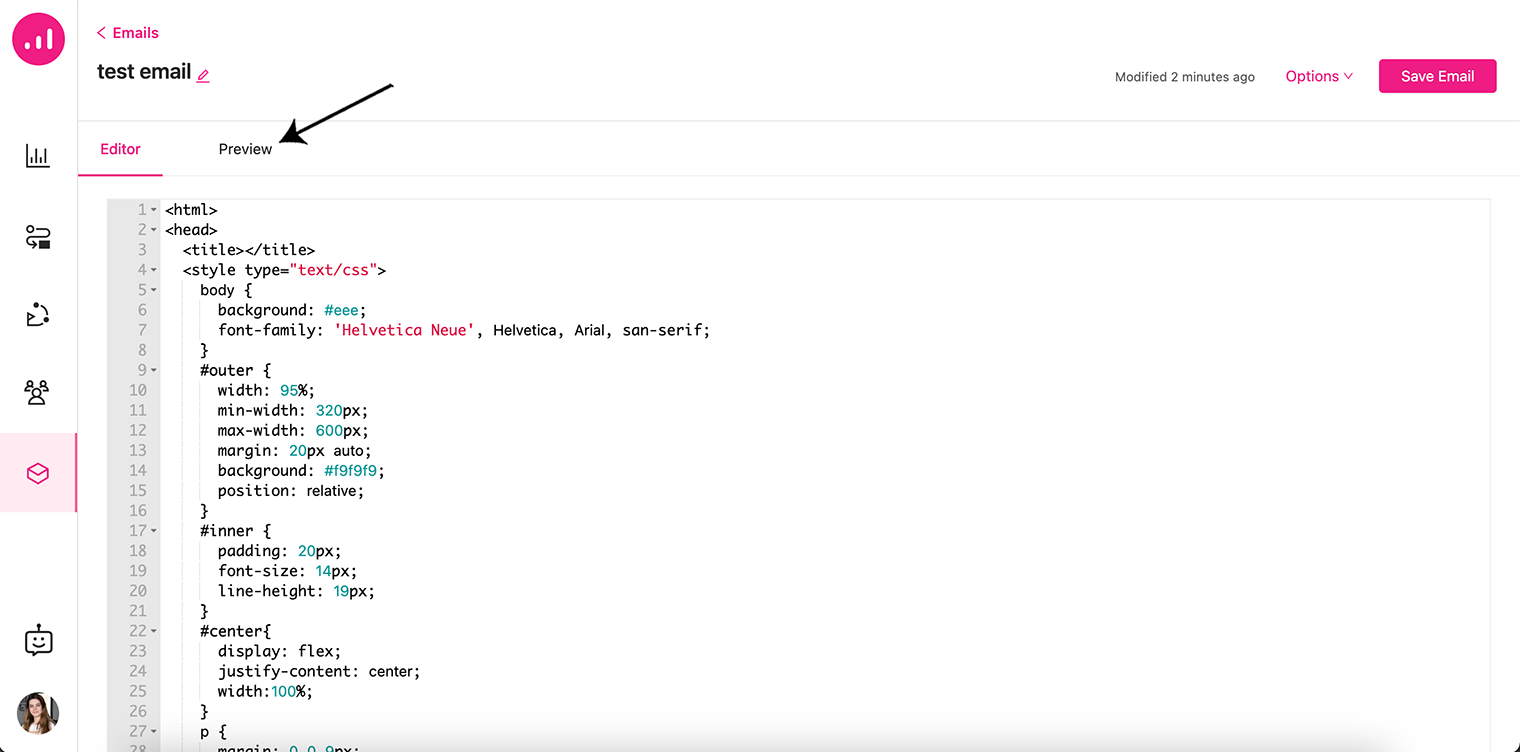
HTML Editor is a great new way if you want to custom-code your email templates or use third-party email builders to build them.
Webhooks
Webhooks are tools that allow web apps to communicate with each other in real time. The term webhooks is used to refer to user-defined HTTP callbacks. They enable you to configure certain events on your website and then log them directly on another site.
For example, when a user signs up on your website, a certain email campaign gets opened or a contact unsubscribes, webhooks can send an HTTP request to a configured URL, which we call an endpoint.
Send HTTP Request (Webhook) is now added to Growmatik as a new action type and you can use it within your automations to communicate with other tools or web apps.
You can set a webhook for any event to send a pack of data to an endpoint, like another web application, CRM or marketing tool.
In order to test it, you may generate an endpoint URL using services like requestbin, enter custom body or headers as authenticator constants, modify user data fields and finally save it.
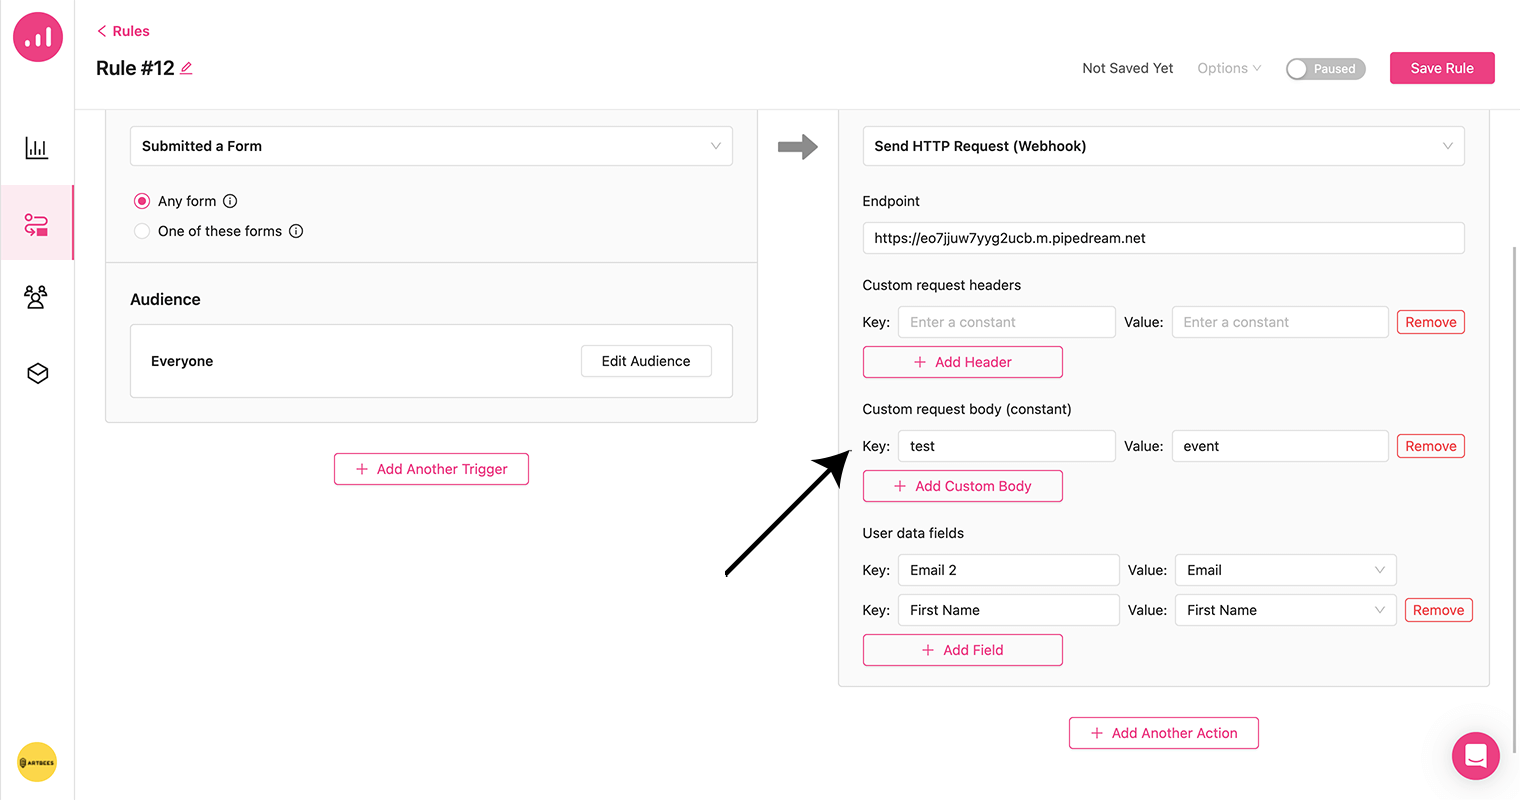
For the above endpoint, we needed to enter only the body constant as a Key and Value. As a result, the output data looks like this:
{
    "test": "event",
    "Email2": "testemail@company.net",
    "First Name": "James"
}
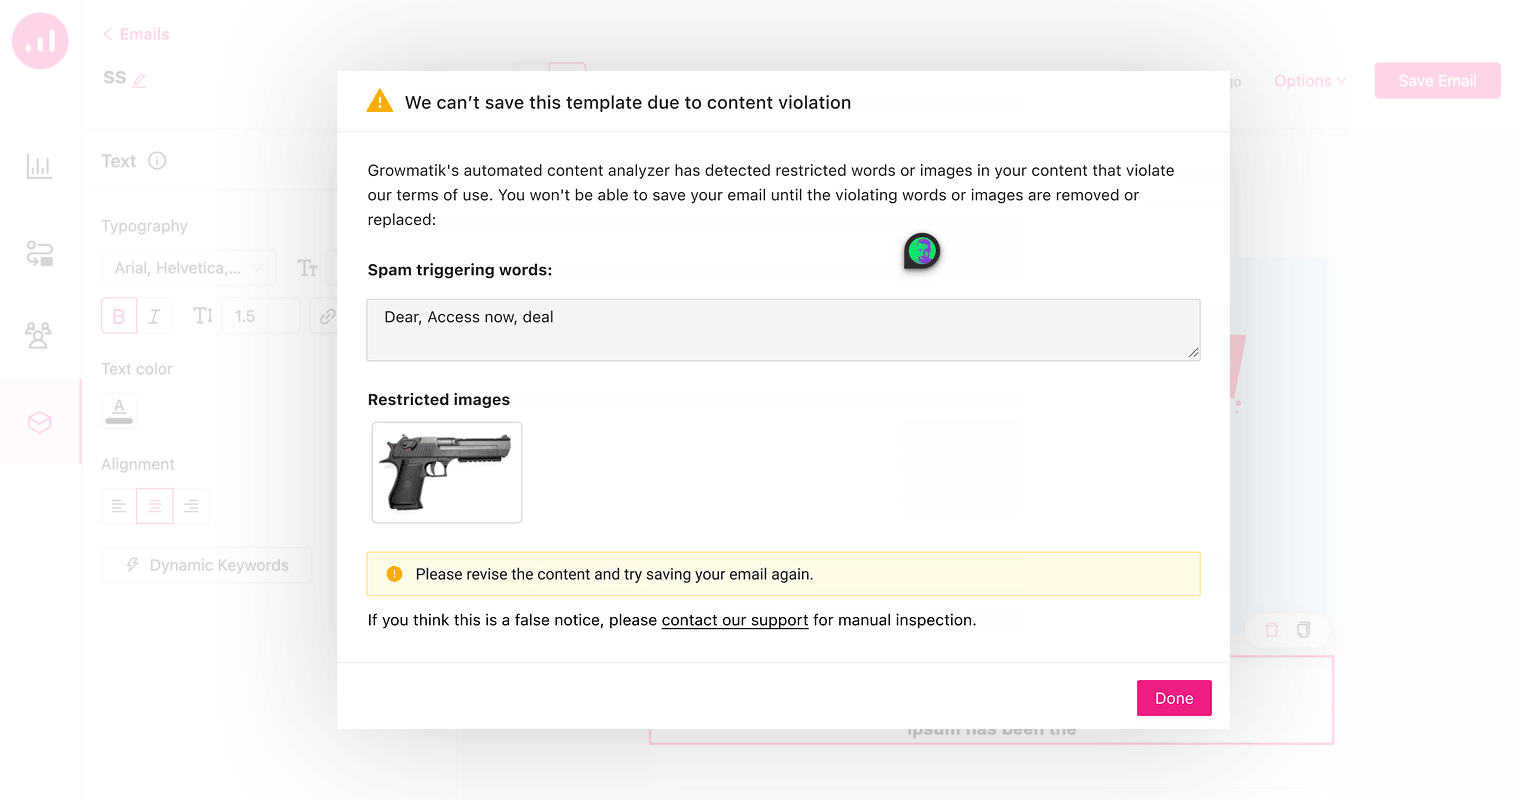
Image Content Validator for Email
Growmatik email builder is now equipped with a built-in image validator to automatically check for possible sensitive imagery. This will help you to prevent your emails from being labeled as spam if you’ve added a spam trigger image into your email template. Imagery that could be offensive to some recipients, such as violence, pornography or surgery, is considered sensitive content. So, the image analyzer will reject your email content if you use even a single sensitive image.
Checkout Started Event
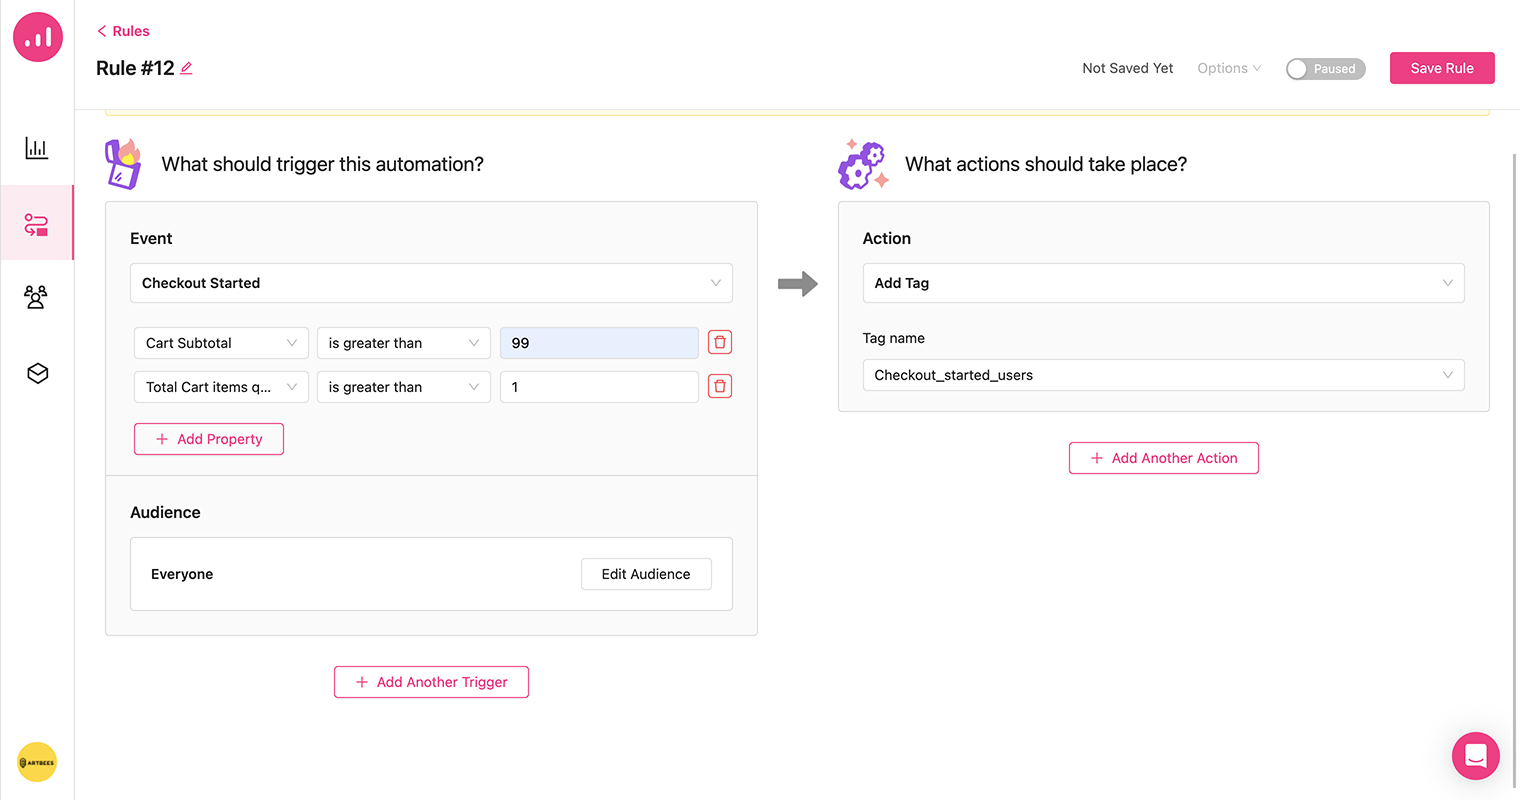
Checkout Started event is a great new way to create automations after a checkout session is started by the customerU, for example cart abandoners follow up email sequences or upselling popups based on the type or quantity of the cart items. Let’s dig more.
With this new trigger event, your automation actions will be triggered when a user begins a checkout session. Checkout Started event comes with multiple properties that include:
- Product in Cart: used to trigger the event only when specific products are added.
- Product Category in Cart: if there are products in a certain category, then the event will be triggered.
- Product Tags in Cart: useful when triggering the event based on product tags.
- Cart Subtotal: if you want to trigger the event when cart subtotal exceeds or falls below a certain amount, this is useful. Defining a range is even possible.
- Total Cart Items Quantity: helpful when deciding whether to trigger the event based on the number of items in the cart.
Events can be set without any properties or with properties. For example, if you intend to use these properties, you can:
- Let the user know about a free gift together with a purchase when a specific product is added to the cart.
- Recommend related products to the user to encourage them to add more items from that category to their cart.
- Reward your customers with discount coupons to use on their next purchase for buying products with a specific tag. Users will be more likely to make repeat purchases and become loyal to the brand if you give them this opportunity.
- Offer free shipping when the cart subtotal exceeds a certain amount to motivate users to add more items.
- Provide a discount when the user adds a certain number of items to their cart.
Both Shopify and WordPress users can use the Start Checkout event. But let’s see what happens in different scenarios:
- When a registered and also logged in user gets redirected to a WooCommerce checkout page, this event will automatically be triggered.
- When a guest user adds a product to his/her cart in WooCommerce and then visits the checkout page, this event is triggered once the email address is filled in the form without submitting it.
- In Shopify, regardless of whether a guest or registered user entered the checkout process, the Continue to Shopping button in the Information step should be clicked for Growmatik’s Checkout Started event to be triggered.
Checkout Started Analytics
As part of Growmatik’s Analytics page, you can also view a decent report on analytics related to the Checkout Started event. This new section in the Analytics page shows following metrics within the specified timeframe:
- Open Sessions: The total number of opened checkout sessions.
- Completed Sessions: This is the number of checkout sessions that have been successfully completed.
- Recovered Sessions: The sum of abandoned checkout sessions that are completed due to marketing campaigns by Growmatik.
- Expired Sessions: The sum of checkout sessions that are abandoned for more than 14 days without being completed.

What’s next is some of the most anticipated features Growmatik community has requested to see, such as:
- Abandoned cart event for guests
- Members (collaboration)
- Ability to Import image from Unsplash to media library
Some of these features might be even visible for some of our users as we are testing it for selected tenants, however we will soon finish the testing and announce the release of these exciting new features to our community very soon.
Stay tuned and let us know how you like the new features. We hope to hear your feedback and continue to enrich Growmatik more and more for better marketing automation and higher business results.