Summary:
In this article, you’ll learn how to use the Growmatik Show Pop-up action in Growmatik.
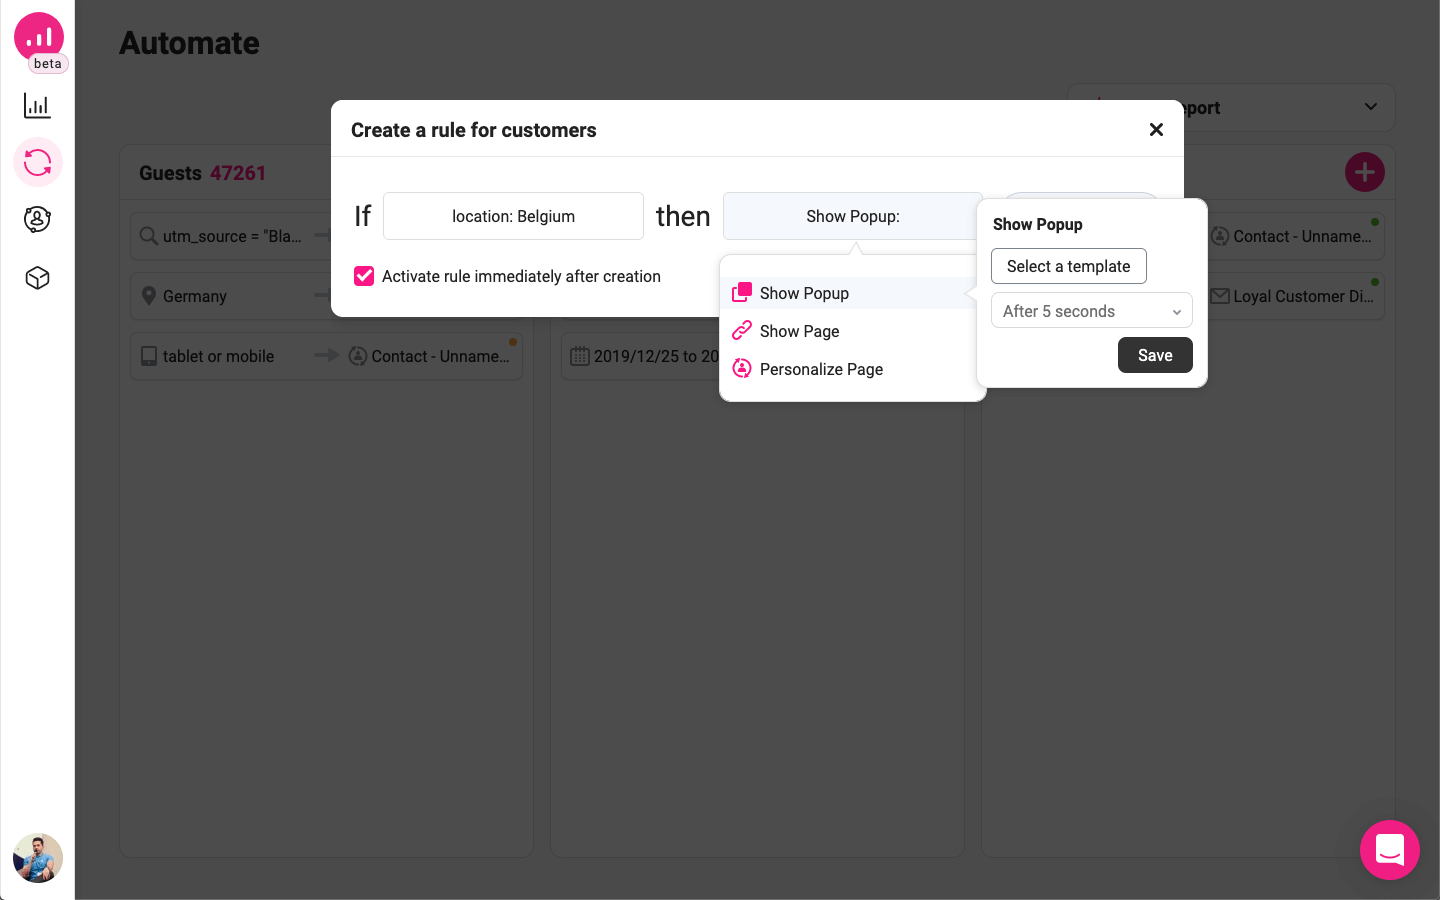
Setting up the Growmatik Show Pop-up action as an automation rule allows you to display a pop-up on a page when the condition of the rule is met.
Defining a show pop-up as an action:
- In the Growmatik Automations page, click on the
 button of one of the columns to create a rule.
- Set a condition.
- Click Set an Action, select the Show Pop-up action, then click on Create Pop-up.

- A new dialogue will open that includes all the ready made email templates that are available for different purposes. Explore the templates in different categories by clicking on them to see a preview. Then, select a template, give it a name and click on the Customize button to open the popup builder.
- You’ll be taken to the Pop-up Builder environment to customize your pop-up as you like.
- Customize the pop-up template , then click on the Save & Exit button.
- Define when the pop-up should be displayed:
- After 5 seconds
- After 10 seconds
- After 20 seconds
- Scroll to the middle of the page
- Scroll to the end of the page
- On exit
then save.
- You’ll see the rule creation dialogue where the condition and the action are set. Click on the Create Rule button to add the pop-up rule.


Note: If the option of Activate rule immediately after creation is checked, the targeted users will receive the email shortly.