
It’s time once again to share with you all the new features and improvements we’ve introduced in the recent months since the last release. We are so thrilled to have shipped some of the features and functionalities requested by our community. In this post we will provide a quick overview of what we’ve shipped since June 2021, including:
- New user experience and extra options in the email and popup builder
- Compatibility with Easy Digital Downloads
- Compatibility with guest customers
- Better onboarding experience
- Better template management
Let’s dive into the details!
Brand new email and popup builder experience
In the new version of Growmatik there has been a huge improvement in the email and popup builders. Now all the parameters related to builders and their elements have moved to the sidebar, which facilitates a much better and more pleasant experience when it comes to building and customizing your emails and popups. Now your template content won’t be covered by context menus, so you can simply apply changes to settings from the side bar and see the results in your canvas in full without any blockades.
More styling options for various elements
We’ve added a bunch of new styling options that can be added to different elements:
- Set line height for the Text element.
- Image element now has an alt text, image size, original image size and link option.
- Icon spacing and icon size is now included for the Social element and all links will opened in a new tab by default.
- Now you can set the width and border width of the Button element.
- Spacer element now has a divider feature to separate sections.
- The Form element in the popup builder has seen a huge improvement and new features have been added. You can map the form fields to custom attributes. Also you can rename all the labels in the form element.
- The email builder now has a footer element locked on the bottom that can be styled like a regular element from the side but its content can be customized from the email settings page.
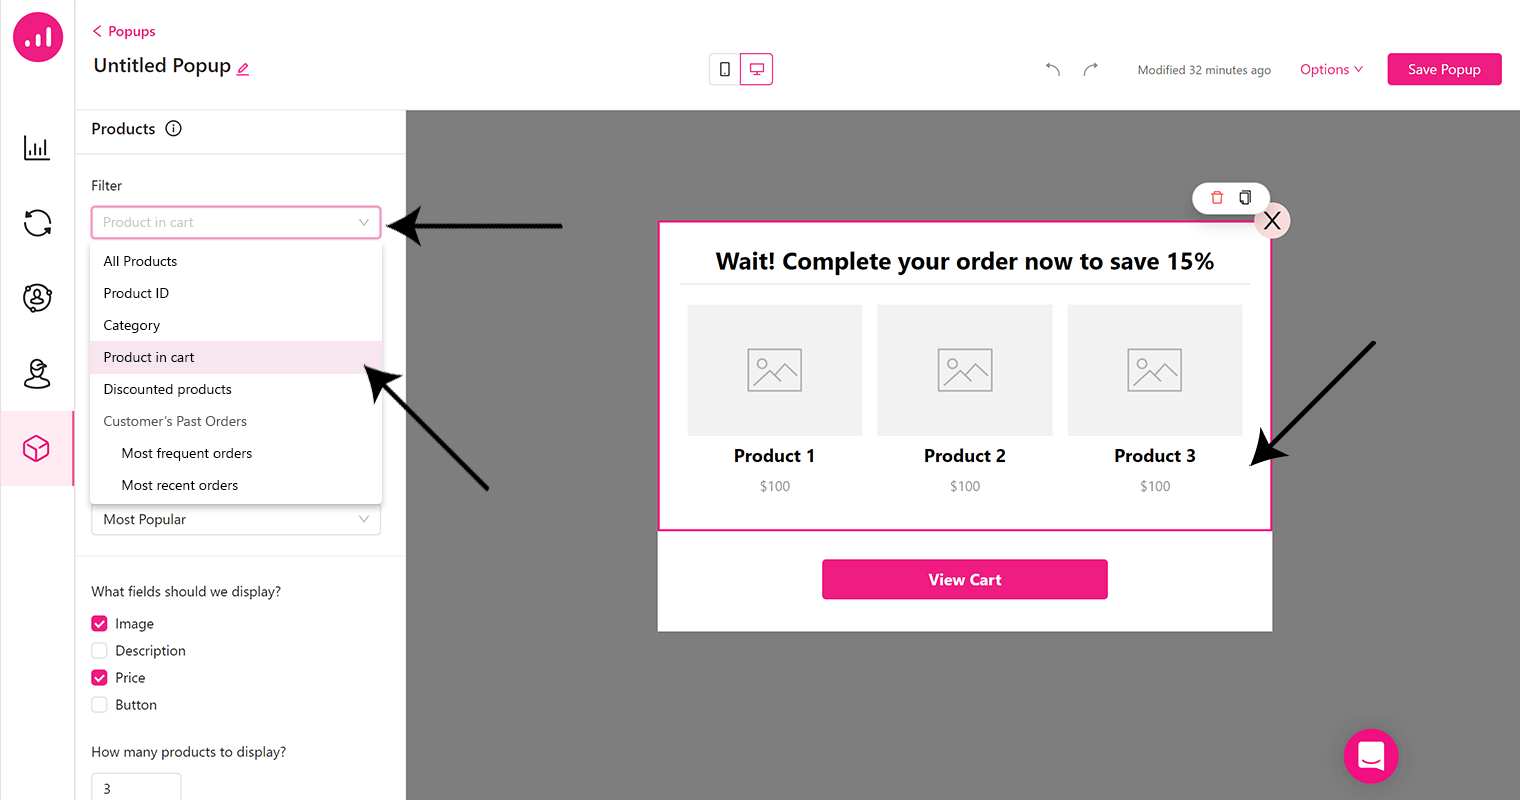
Many new filtering options for the product element
The product element now offers many more options for filtering the product you want to show in popups and emails. This includes new filters for related, cross-selling and upselling items based on the cart content, recent purchases, recently viewed products and much more. The complete list of filtering options for the product element is as follows:
- All products
- Product ID
- Category
- Products in cart (previously abandoned cart products)
- Discounted products
- Related
- Related to product page
- Related to products in cart
- Related to previously viewed products (same session)
- Related to all past orders
- Related to the last order
- Cross-sells (Linked products)
- Linked to existing product page
- Linked to products in cart
- Linked to previously viewed products (same session)
- Linked to last order
- Upsells (Linked products)
- Linked to existing product page
- Linked to products in cart
- Linked to previously viewed products (same session)
- Linked to last order
Product element now available for popups
Just like in emails, now you can add a product list to your popups and use a wide variety of filters to show personalized products inside your Growmatik popups. For example, you can remind a cart abandoner to complete their purchase with a popup that includes the exact items left in their cart.
Create marketing actions for guest customers
Users who didn’t sign in to your website—and therefore are not leads—but have a minimum of one successful purchase via one-click checkout are considered guest customers. Growmatik now enables you to create all kinds of applicable automation rules for your guest customers.
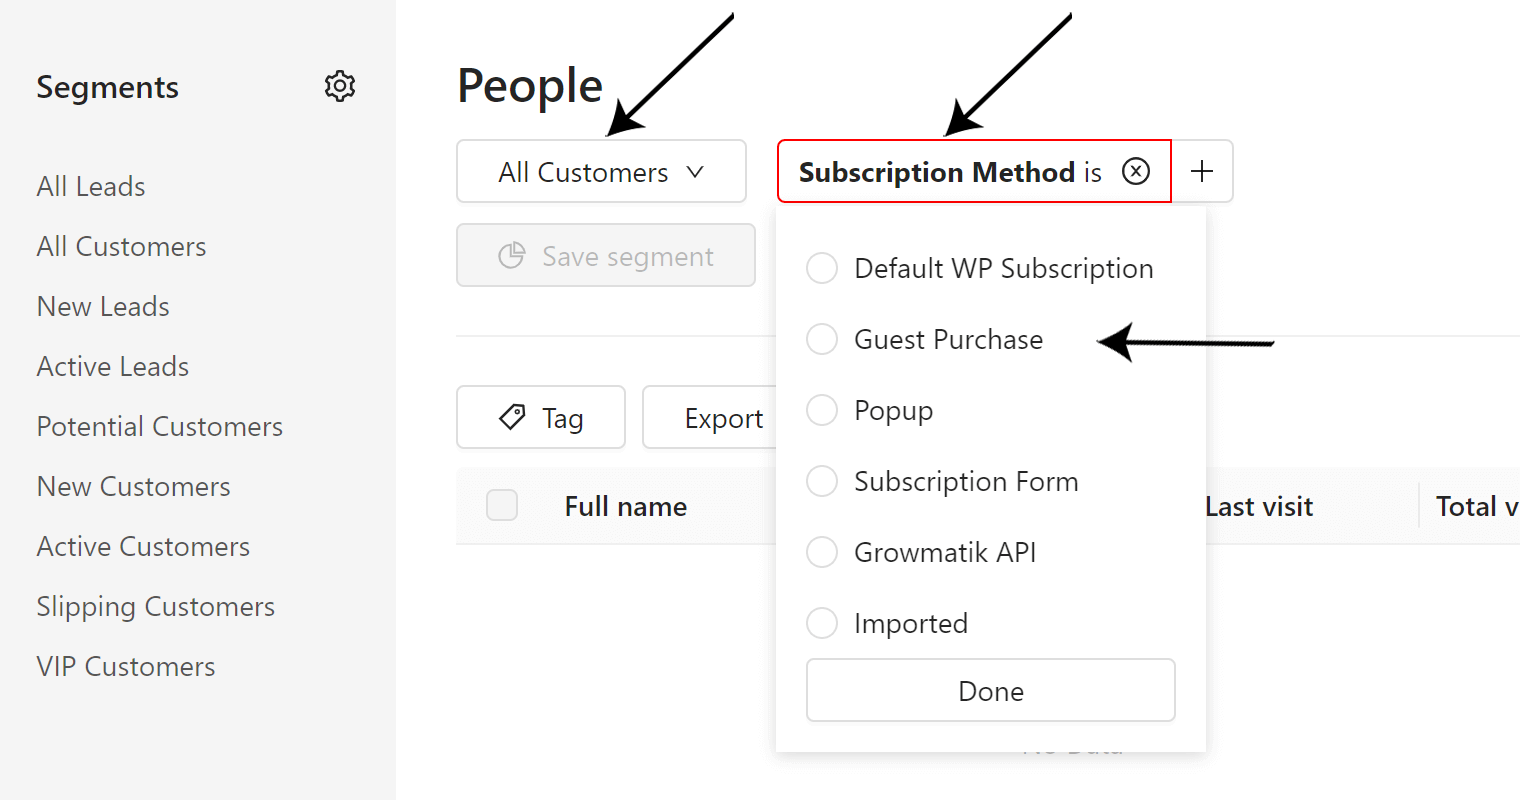
To see your guest customers and create segments for them via the People page, add the following filters from the People page to view them. Remember to select the All Customers segment while adding filters.
Subscription > Subscription Method > Guest Purchase
Creating and managing your templates is easier than ever
You can now manage your templates in a more convenient way.
Just go to the Workshop page and you can see your templates and media organized in the left sidebar.
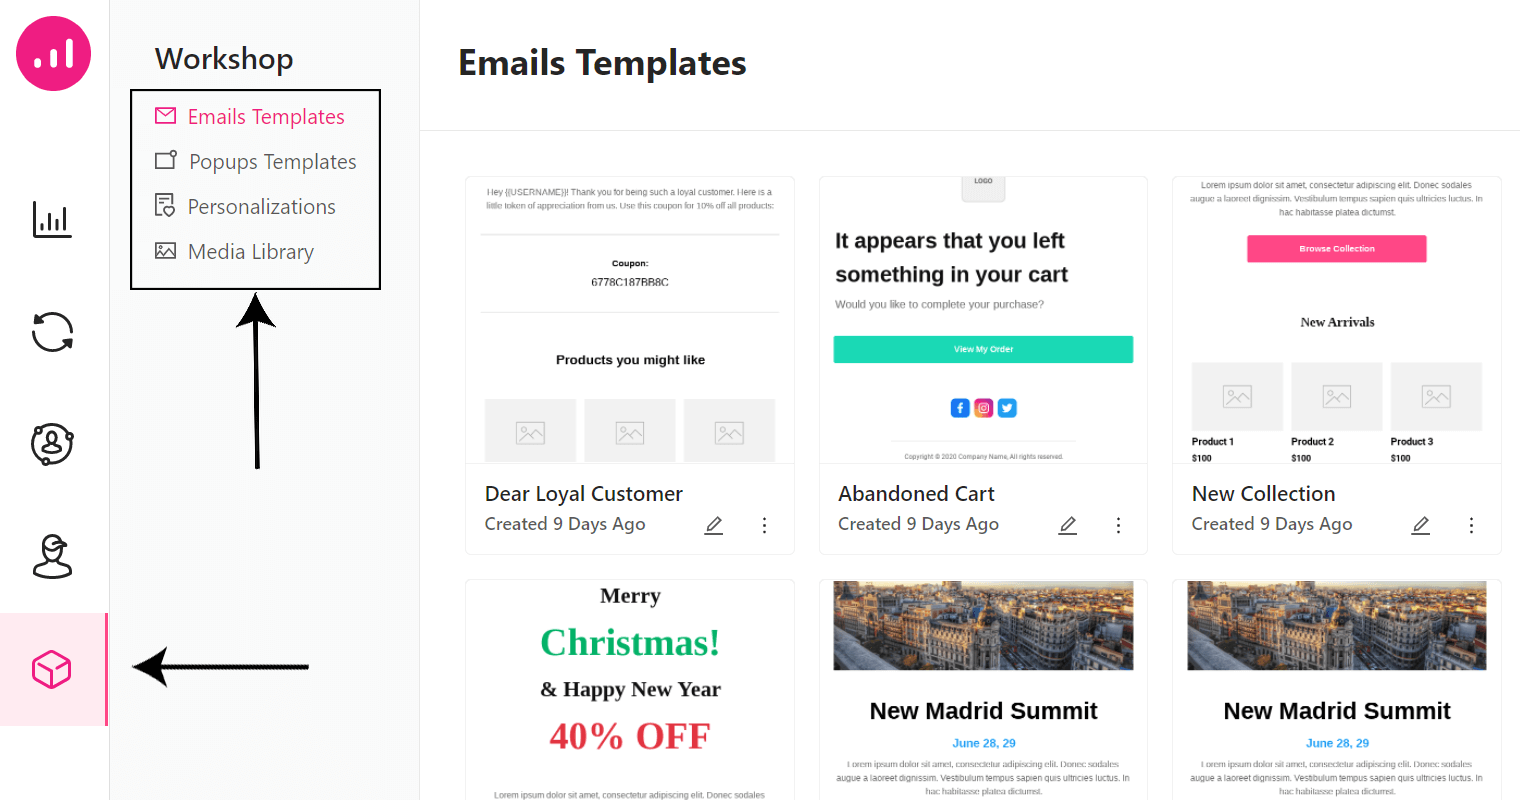
You can now create from scratch, use pre-designed templates or choose from your custom and recently used templates to create a new template for your email or popup.

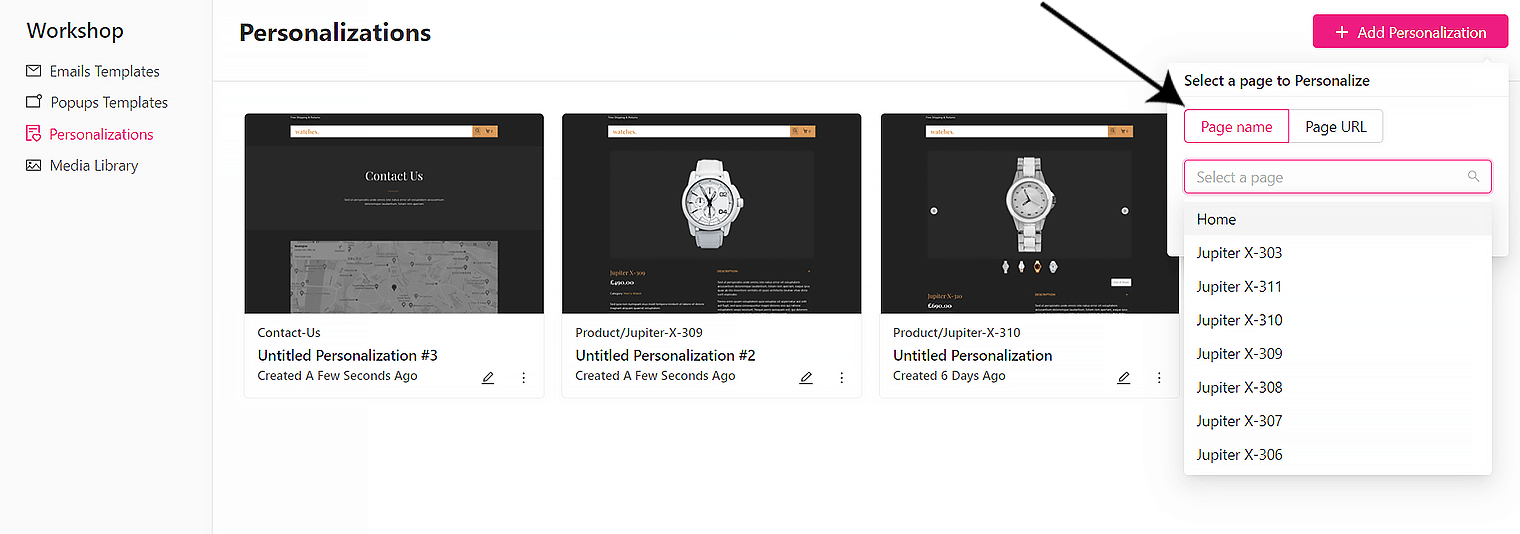
Also, all of your pages are accessible to personalize. Search for your page by name from the drop down menu, or enter its URL and simply find it.
Define the content of email footers
As you probably know, Email Settings is where you can manage your basic email settings and the content you want to show in your emails regarding your business. There are two new additions in this section that will make managing your settings easier and more practical: Company postal address and Footer content.
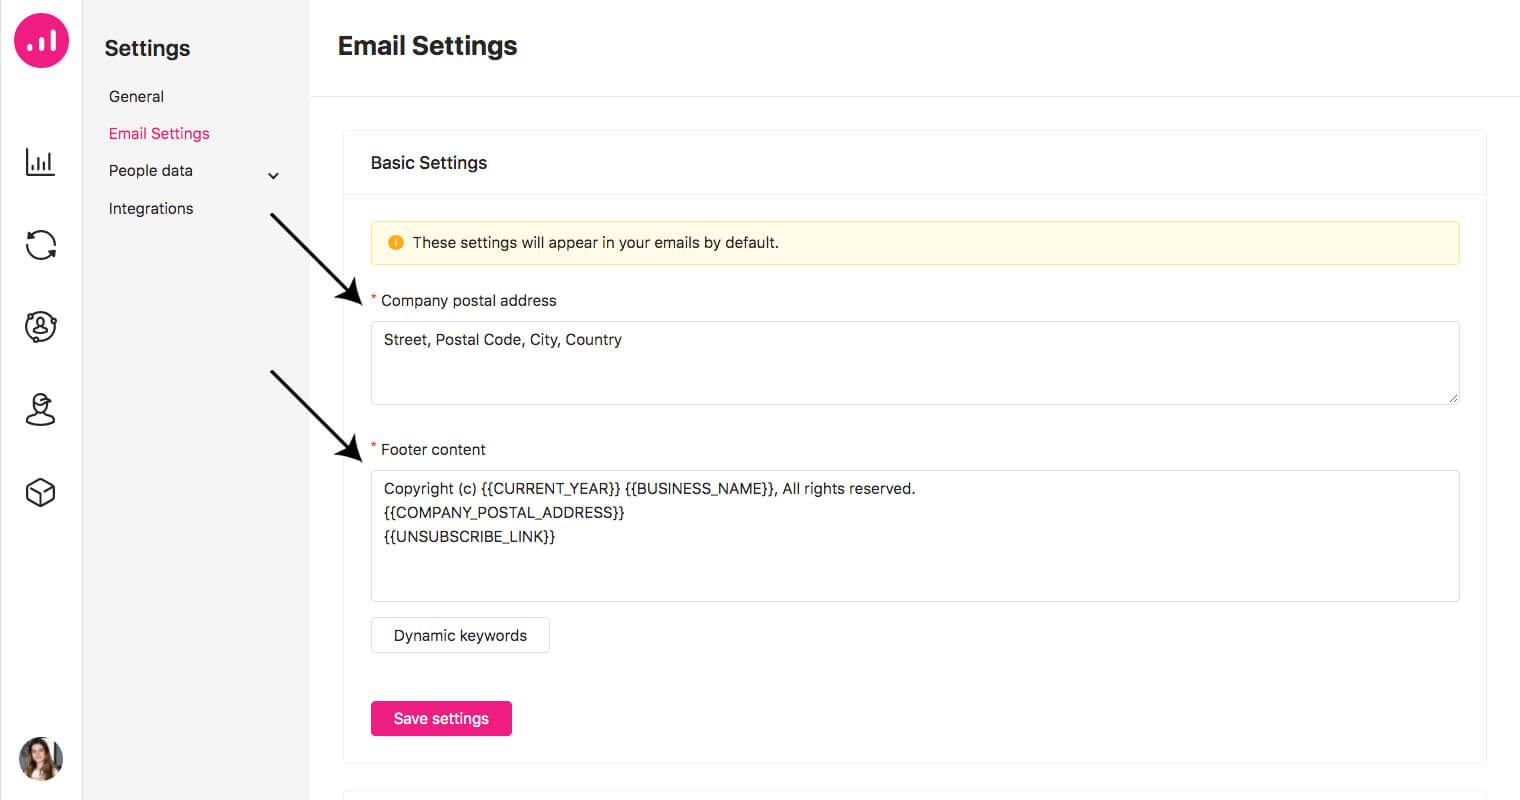
Define company postal address
In this section you can add your company postal address to be shown in the footer of your emails. Access Email Settings from Profile > Site Settings > Email Settings and you will see a field titled Company postal address that is outlined in red, which means it’s mandatory to fill in this field in order to send emails. It should be manually filled in by you from scratch with your company information.
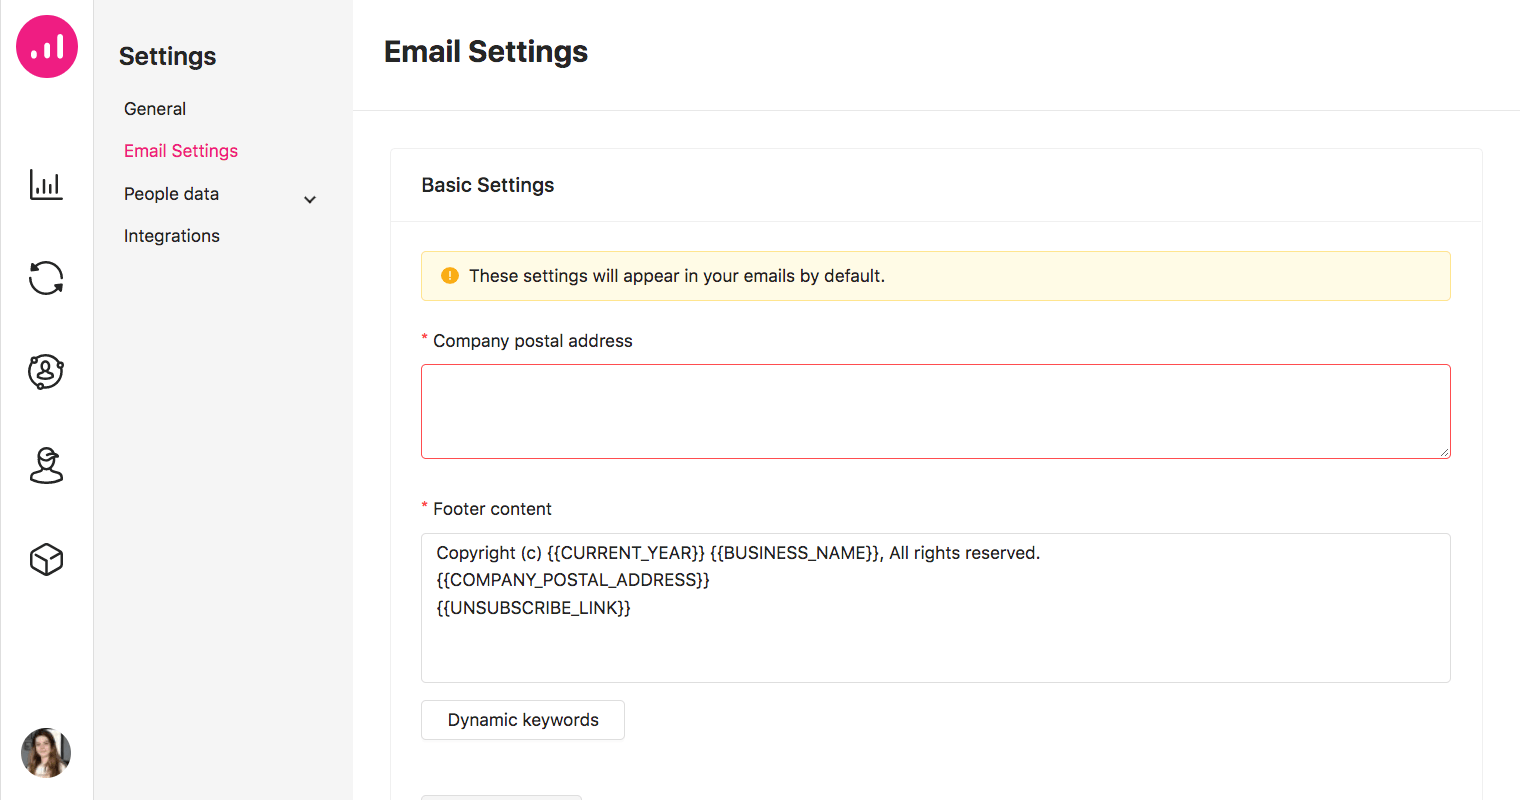
Define email footer content
Here you can edit the content of your email footer using dynamic keywords and/or by typing any extra information needed. Just like the company postal address field, this field is also required in order to send emails.
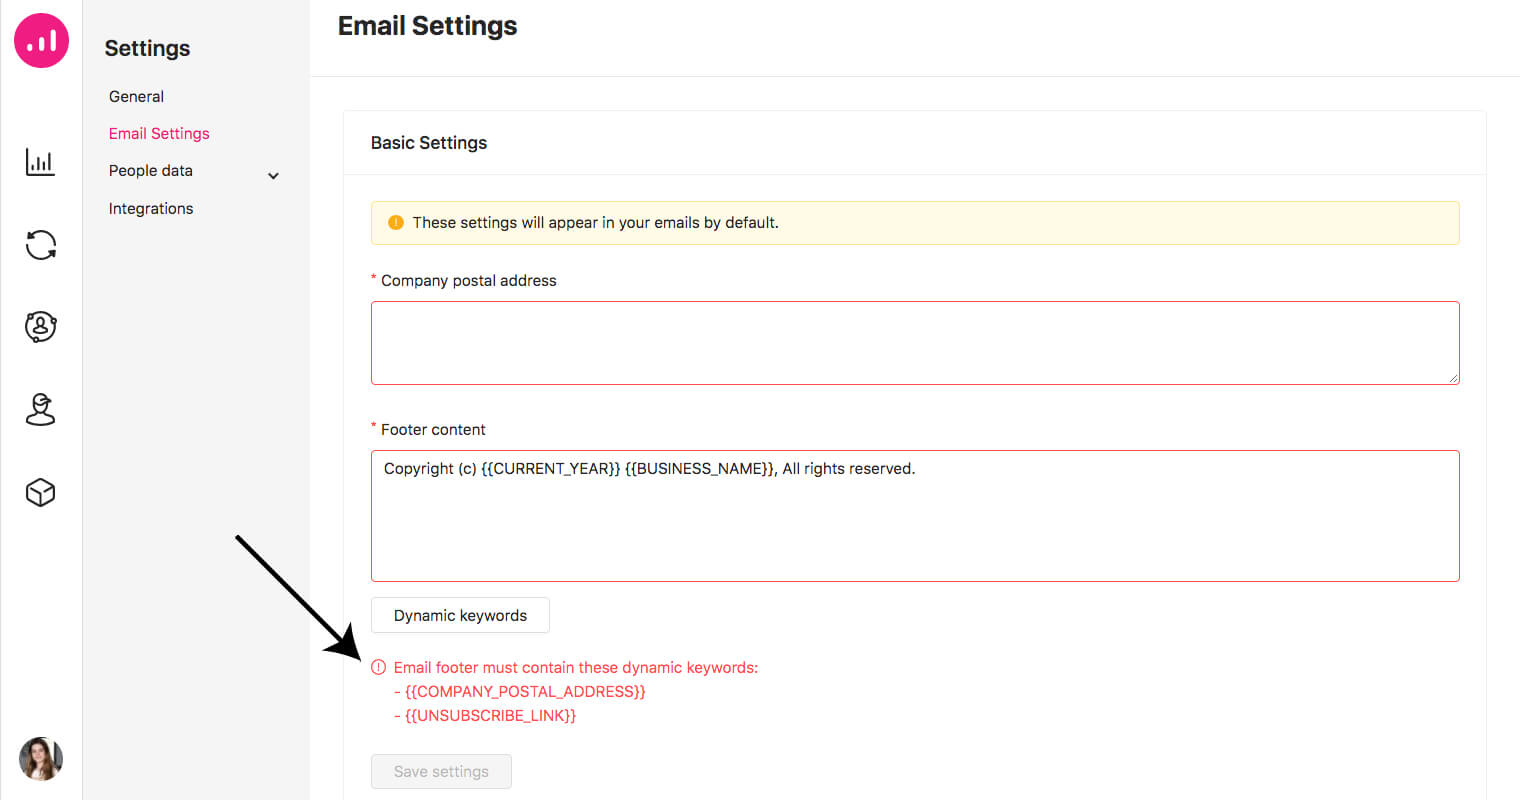
Some dynamic keywords are added to this field by default and can be edited, copied, pasted and removed. But two of these keywords CANNOT be missing in your footer:
- {{COMPANY_POSTAL_ADDRESS}}
- {{UNSUBSCRIBE_LINK}}
If you remove these two keywords from the field you will not be able to save the form and finish the process of setting your footer content.
Use dynamic keywords in the footer to keep it up to date
Dynamic keywords are not new in Growmatik. However, there are four newly added keywords that will facilitate setting up your footer content, as mentioned above:
- {{COMPANY_POSTAL_ADDRESS}} : You need to manually enter your company address and it will be saved under this keyword.
- {{UNSUBSCRIBE_LINK}} : Growmatik will create this unsubscribe link by default.
- {{BUSINESS_NAME}} : Your company name, which can be edited anytime from Site Settings > General
- {{CURRENT_YEAR}} : The current year (e.g. 2022)
You can access these keywords via Dynamic keywords > Miscellaneous and you will see all the keywords listed.

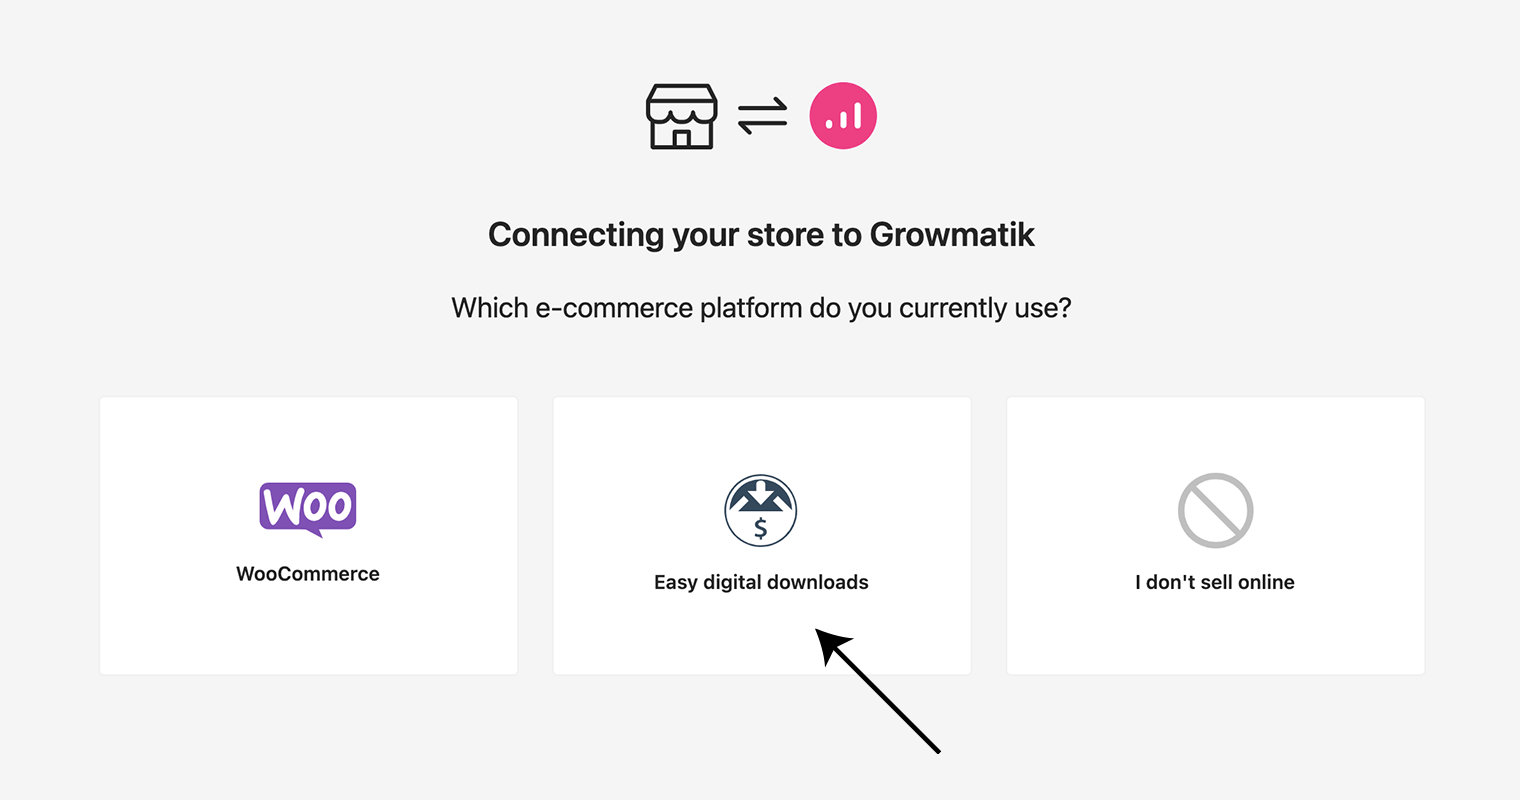
Easy Digital Downloads compatibility
Previously, Growmatik only worked with WooCommerce; however, it’s now compatible with Easy Digital Downloads (EDD). Anyone who is using EDD can now integrate their store with Growmatik. All users need to do is have EDD and Growmatik plugins activated on their WordPress and Growmatik will automatically recognize the platform.
Growmatik is now able to receive EDD website engagement metrics and all other related data, including customers, products, purchases and more to organize them all via its dashboard.
New onboarding
Now that the new onboarding process has been deployed, getting familiar with Growmatik’s features is easier than ever. After users register an account, an automatic guide is the first thing shown in the Growmatik dashboard. This guide will lead you through the following seven steps to complete your onboarding:
- Connect your store/site
- Import your contacts
- Create your first automation
- Send your first email
- Display a popup
- Personalize a page
- Create a customer segment

Initially, it connects Growmatik with your e-commerce platform, either WooCommerce or Easy Digital Downloads (EDD). Then, if you have a CSV file of your contacts, you can easily upload it. Next, you will learn how to create your first automation rule, select a template for your first email and popup and send it all. Or you can start personalizing a web page! Finally, you will learn about customer segments and how to create one.
Moreover, tips will be displayed for each new section you visit explaining its functionality. Growmatik’s new onboarding gives users an overall sense of being in a familiar place.

And that’s not all!
The above features are not all that we’ve been busy working on. In fact, some of the biggest new features and additions we have been working on are not yet ready as of the moment of writing this article and are undergoing the latest phase of testing. As usual, stay tuned for more updates about what’s coming to Growmatik soon and let us know what you think about the above features!